Category Archives: Straight Razor Shaving

Best Straight Razor for a Beginner

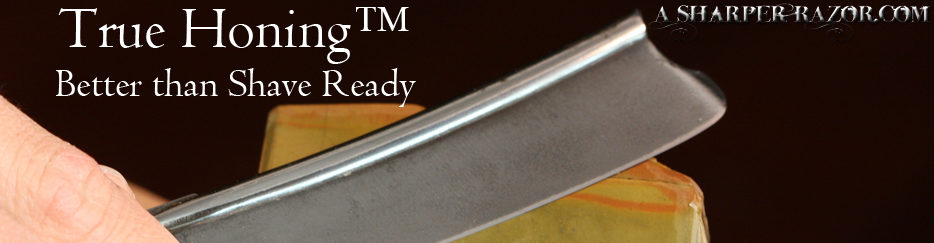
This question inevitably is always asked by the person seeking to purchase a first straight razor. I’ve answered it countless times and usually in the same manner espousing the conventional wisdom of: a ” 5/8″ blade, full hollow, & round point”. Historically, this always leads people to the Dovo Best. The question still remains, is the Dovo Best really the best straight razor for a beginner? And why?

dovo best

Characteristics of a Good Starting Razor

Before we explore this topic any further, we need to examine the characteristics that make a good starting razor, starting with hollowness. A full hollow is recommended for two reasons: 1) it is vastly easier to self maintain than a wedge or other thicker grind, and (most importantly) 2) you can’t buy a wedge, 1/4 hollow, or true half hollow for a reasonable price. The full hollow razor became the dominant straight razor form because it is vastly easier to sharpen. It allows the user to simply lay the razor flat on the hone and the spine provides a ready-made guide. It’s almost fool-proof. In addition, with the advent of the double wheeled grinding machine, full hollow razors are vastly cheaper to produce as they require much less labor.

A round point is recommended because a square point or spiked point is, well, pointy. While you can grind off the very tip and round it out, round points are readily available. If the very tip is not rounded off, it becomes a likely source of pain if you accidentally jab it into your skin. Also, it can scratch your strop. But most importantly, you can’t find any square points available unless you buy vintage. So, while there’s really no compelling reason you need to purchase a round point over any other point, the fact remains that round points are the dominant form in the marketplace today.

5/8″ is touted as the ideal width for a starting razor. This is simply because it is in between what is considered a small razor, 4/8″ and under, and a large razor 6/8″+. The disadvantage of a 4/8″ blade is that it is harder to judge the angle with and lacks the heft of a thicker razor, therefore it lacks momentum to carry the blade through the cut. The disadvantage of a 6/8″ blade is that it is heavy and considerably larger when compared to a 4/8″ blade. The 5/8″ is therefore the easy compromise. However, there is no compelling reason that you need to start with a 5/8″ blade. It is simply the practical in between choice. There’s no wrong answer. Only what you as the user would prefer. So, if you think you want a more nimble blade, you should buy a 4/8″ razor. If you want more heft and an easier way to judge angles, then buy a larger razor. However, a 7/8″ razor is generally considered very hard to wield and should be avoided.

Establishing that all of these conventional wisdom’s boil down to purely personal preference and availability, what then are the characteristics that are absolutely needed?

1. Shave readiness

2. Made from high carbon hardened steel. Stainless steel comes in high carbon varieties too.

3. 6/8″ or under

4. Within budget

Introducing the Contenders

So, now that we have actual criteria upon which to judge the contenders for best new straight razor, let’s see what is available. Starting with the Dovo Best, any razor that costs more than the $120 price tag, cannot be in the running as it would violate rule #4. Thus, we are left with the following: Dovo Best, Giesen & Forsthoff, Gold Dollar, & Fromm. Other razors that get purchased often are razors made in China out of 400 stainless, Pakistani razors, and GB Buckingham razor (also made in Pakistan). None of those razors are real and cannot be sharpened, thus violating rule #2.

Do Any Measure Up?

Out of all of the contenders, the Dovo Best is the clear front runner. If we ignore the $120 price tag, the Dovo Best has it all. It comes shave ready from the factory, it has decent aesthetics, the quality control is pretty good (aside from a few bent razors and misaligned grinds), and it works. Plenty of people buy this razor. But is it the best option for a starter razor?

So, the Dovo Best gets a lot of pluses. However, when compared to other straight razors in higher price brackets, the lowly “Best” just doesn’t look as good as it once did. The scales are made from plastic and the feel will never change. The design is uninspiring. In every single way, it’s simply mediocre and simple. It’s functional and that’s really it. And for $120, it’s a very very large financial commitment.

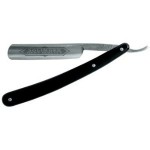
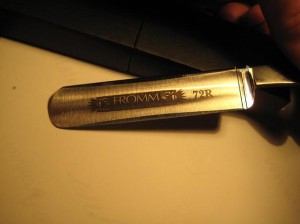
Giesen & Forstoff and Fromm belong in the same category, even though G&F is a slight step above Fromm. Both makers do not sharpen their razors to shave ready from the factory, they charge about the same price, $55-$75. While they have the same aesthetic qualities as the Dovo, unfortunately both makers don’t get terribly good reviews. In my experience, both brands do hold an edge and are made from hardened steel. However, the edge they take is not as good as Dovo and the edge holding qualities don’t quite measure up. G&F has made some improvements in this area over the years, but still needs work. Also, both razors need some serious work before they are shave ready, a big minus and additional cost to the end user. Therefore, I cannot recommend either of these razors as the best beginner straight razor. They make for decent gifts though. Also, G&F offers some nice (if roughly finished on the inside) scales.

You can see the poor master grind as revealed by the uneven spine wear

You can see the poor master grind as revealed by the uneven spine wear

So, that leaves us with the Chinese made Gold Dollar. Now, before you begin, you must realize that China has become the manufacturing hub of the world. Nearly everything is made there. From the inexpensive to the luxury brands, China makes it all. But can they make a straight razor?

The answer is actually yes. They can. They’ve been doing it for 20 years now and they’ve made incremental improvements to their flagship lines: the 208, 300, and the 800 (custom built for ASR). I wouldn’t be selling these razors if I didn’t think they could do the job. However, there are some things to consider before plunging in.

Gold Dollar 208-1

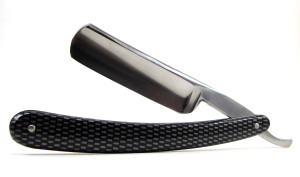
GD 208 – pure workhorse

First, the higher the number, the better the fit & finish. This means that the #66 is basically a roughly ground piece of hardened steel set in some really flimsy plastic scales. The 300’s scales are slightly better, but not really much of an improvement. However, the carbon fiber scales on the 208 are about the equivalent of Fromm & Dovo. Still cheap & plastic, but thick & rigid plastic. As such, it is advisable to stay away from any models under 200, and we will only discuss the 208, 300, & 800 models from now on.

So, how is the fit & finish? Well, it’s not up to Dovo’s standards. The 208’s logo is painted on and the stamp is lightly stamped in some cases. However, the GD factory is transitioning to laser etching. Okay, but what about the polish & grinding? Again, not up to Dovo’s standards. Even the 800 isn’t as good as Dovo’s. The 208 suffers from a lack of fit & finish. The razor is polished, but the factory doesn’t care too much about evening out the lines or making things perfectly shaped. They’re perfectly okay with leaving the razor slightly unfinished in terms of polish.

The 300 & 800 are much better off compared to the 208, however, they don’t quite equal the Dovo. That said, the tang is usually ground flat, the spine is polished and more even, the point is more uniform from piece to piece, and the logo is laser etched. I would rate the fit & finish as decent, whereas Dovo Best is good. More expensive razors such as Wacker would rate excellent.

Okay, aesthetics aside, how is the performance?

This is where the Gold Dollar will surprise you. It is by no means a Lamborghini, but it sure performs on the same level. The steel alloy used takes and holds a very good edge. Indistinguishable from Dovo. The master grind is always to spec. The stainless steel they use also performs excellently.

DSC06392

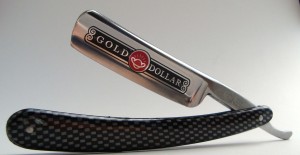
Gold Dollar #800 features a higher level of fit & finish compared to other Gold Dollars

In other words, the Gold Dollar is pure performance and not so much aesthetics.

The Verdict

Seeing as two of our four contenders have been disqualified for performance issues, the choice comes down to the Dovo and the Gold Dollar. Quite frankly there is no right choice here. However, the choice is pretty simple: on the one hand, you can choose to have a mediocre looking razor with a higher level of fit & finish, but with a very high price tag, or you can choose a not so good looking razor with a lower level of fit & finish, but with the same performance and at less than half the price.

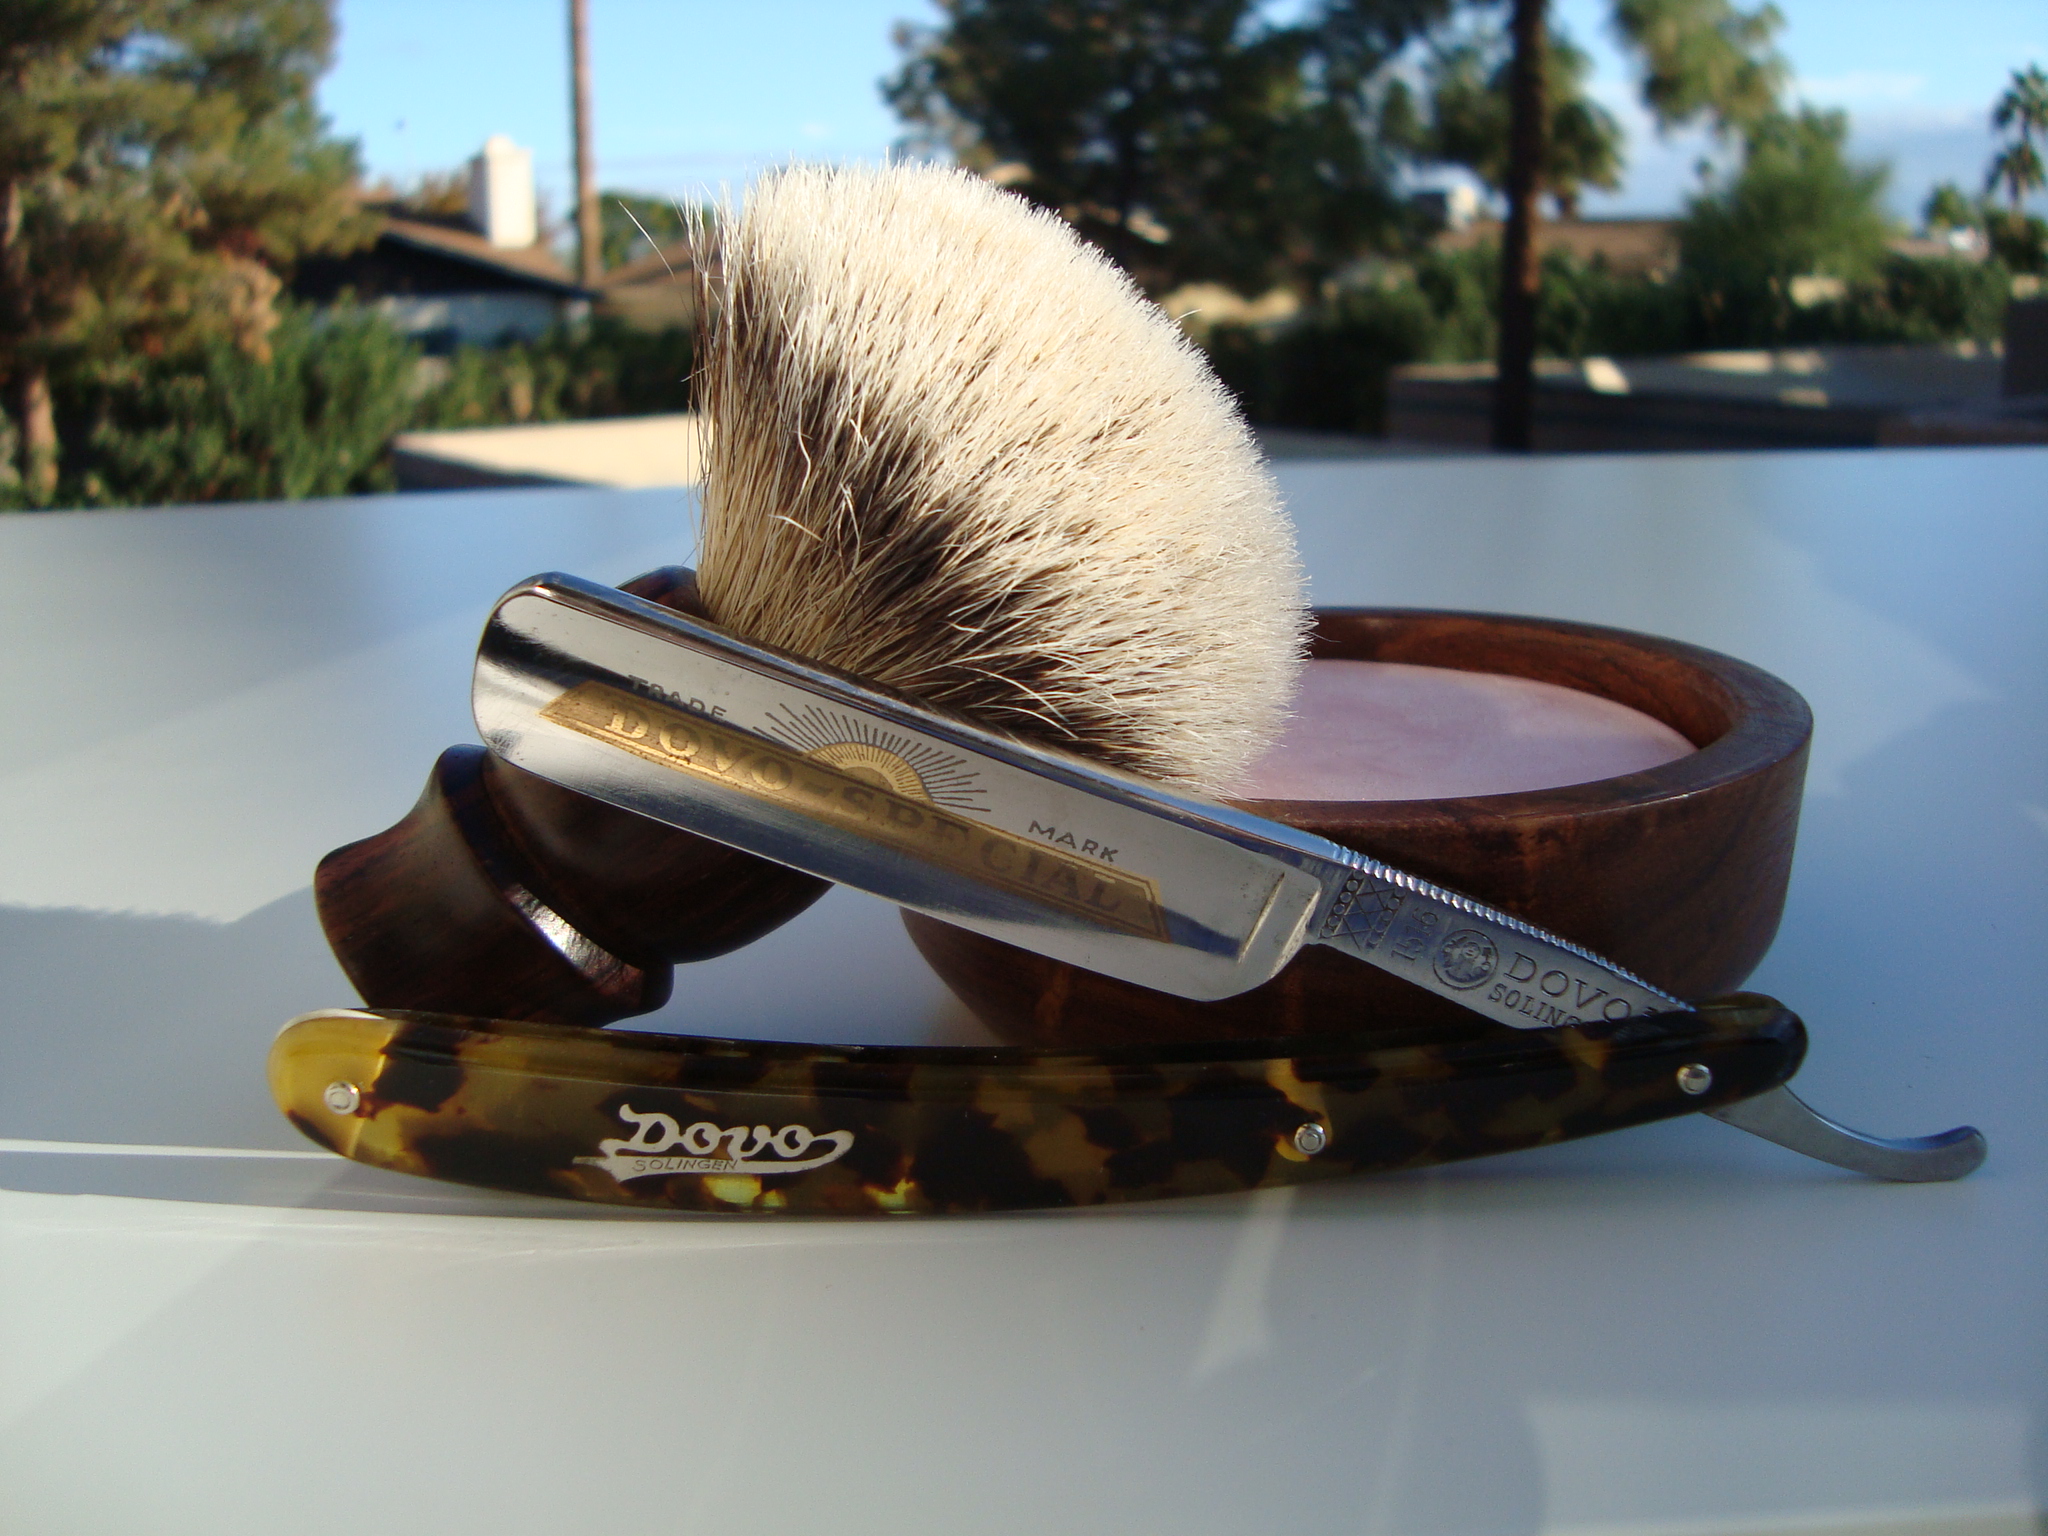
Since aesthetics are not a factor in determining which is the best beginner straight razor and price is, the winning vote must go to the Dovo. But don’t let that stop you from buying one if you have the means and prefer it’s looks. However, I would suggest the Dovo Special in faux tortoise shell instead if you’re willing to spend a little more.

The Gold Dollar beats out the competition because it performs equally well, but costs a hell of a lot less. It’s not something you want to pass down to your children, but it is something you wouldn’t mind losing or damaging. It’s the beater car you buy to train in.

One last consideration is which one to buy. The 300 has a single stabilizer instead of a double stabilizer and has a pretty good level of fit & finish, however it comes in some funky scales. The 800 is a good choice if you want a stainless steel razor. It also has a high level of fit & finish in comparison with the 208 and features the same scales. The 208 is the budget option.

The Benefits of Straight Razor Shaving – Why You Should Switch

Shaving with a straight razor (aka open razor) continues to be the artisan method of shaving. Offering the convert better results, significant savings, and unparalleled luxury, the straight razor still reigns supreme. The one glaring area where the straight razor lacks is convenience. Without a doubt, learning to wield a straight razor, stropping, and (if you want to) honing is time consuming and not for the undedicated. Yet, if you can get over that simple shortcoming, you will find that straight razor shaving offers all the benefits and luxury you deserve during your daily shave. Instead of completing a laborious and painful task, you will be enjoying the manliest ritual the world knows. The Art of Straight Razor Shaving.

The Benefits

The benefits of using a straight razor are many. This article will cover all of the major benefits of switching from a cartridge based razor to a straight razor. The biggest two benefits are lower cost and a better shave. Other less tangible benefits include the meditative aspect of straight razor shaving, saving the environment, manliness, craftsmanship, exclusivity, exfoliation, and ingrown hair treatment. We shall start with a discussion of cost.

Shaving with a Straight Razor is the Best Way to Shave

Straight razor shaving has been described by such colorful phrases such as: “The Rolls Royce of Shaving”, “The Ultimate Shaving Experience”, and “The Manliest Way to Shave”. If you switch to a straight razor and spend the time to master its use, you can expect the closest and most comfortable shave known to man at this time. A quick aside, the open razor also holds more lather on the blade so you need to rinse less often.

Users who have switched report that the straight razor gives a much closer shave compared to a disposable. Compared to DE razors, the majority of converts agree that the straight razor gives a closer shave, yet there is a minority of converts who say their DE gives a comparable shave. Regardless, the straight razor gives you the freedom to choose the best angle, the best direction, and the best stroke that works for you and your face. You are not limited in how you can shave.

The standalone blade allows you unparalleled freedom of choice. There is no guard preventing you from either increasing or decreasing the angle. There is no knob to turn if you want a more aggressive shave. No, all you have to do is lift the spine up or lower the spine down to change your shave. In addition to the ability to change the angle, you have limitless options in how you wish to wield the razor. You can do a simple push stroke, an elegant scything stroke, or a dexterous diagonal stroke. Read more about straight razor strokes here. Combining the different angles and strokes, you have complete control over your shave. You can achieve an acceptable and presentable shave with a single with the grain pass if you’re in a rush or don’t want to do a full shave; or you can go the whole nine yards and get the closest shave known to man.

In addition to the freedom of adjustability and closeness, straight razor shaving offers an irritation free shave. Also, users suffering from ingrown hairs report that straight razor shaving has lessened the occurrence of these painful annoyances. Because the straight razor shaves your face by actually cutting the hairs instead of pulling them out and then cutting, the resulting shave is irritation free. Because straight razors are sharpened to a polish level beyond that of DE & cartridge razors, the blade cuts through your hairs with minimal effort. The use of teflon is well documented in DE & disposable razors. Straight razors achieve the same level of slickness through a mirror polish. The result: no razor burn.

Some users even report that a straight razor shave lasts longer than a normal shave. In some cases, a couple of days. This is probably due to the straight razor shaving closer to the skin, perhaps cutting the hairs slightly below the skin in the against the grain pass. Some users even compare a with the grain pass of a straight razor to the against the grain pass of a DE. Regardless of where you fall in the DE v. Straight Razor debate, everyone agrees a straight razor is miles ahead of a disposable.

Straight Razor Shaving is the Cheapest Way to Shave

The math was originally done by John Tischler and explored in Straight Shaving Benefits: It’s the Cheapest Way to Shave! Let’s do the math quickly. A re-honing from us is only $10 and can be stretched out to nine months in between sharpening. That equates to a yearly cost of $25 including shipping both ways. A Fusion cartridge costs $3 a piece and only lasts five days for most people. Less if you have a tough beard or more facial hair. Feather DE Blades cost $.60 and last about the same. Quick math shows us that daily shaving with a Fusion costs $219 per year and a DE costs $43 per year. As you can see, even a DE still costs twice as much as a straight razor per year of use!

Even more savings can be had if you switch to traditional shaving soap and a brush from canned goop. While a puck of shaving soap costs about $20, that same puck will last you up to two to three years! Compare that with canned goo lasting only a month or so and you can see how the investment in a brush can really pay off. Not only that, but a boar brush from Omega is very affordable at $13!

But what about the initial investment you ask? Your right, a straight razor is not cheap. A Dovo Best is $80 and to shave while your razor is out for honing, you do need two straight razors or a backup DE. A cheaper but riskier option (if you don’t know what to look for) is to purchase a vintage straight razor from an antique shop, flea market, or other sale. You can frequently find serviceable razors costing only $20-$30. Add another $20-$30 for a sharpening and you have a serviceable razor for as little as $40.

Even though the intial investment isn’t cheap, the savings after only a year of switching from a cartridge pays for two open razors! A Murkur Futur costs $80 which is the same price as the Dovo Best, even the Murkur Heavy Duty costs $43. So, as you can see, a DE’s initial investment can be pretty similar and the blades will cost you more.

One more calculation should be talked about before closing this section. If you own two straight razors, the need for sharpening each straight razor is cut by half. If you own three, further reduced to a third if you were curious. The reason is that you reduce the wear & tear on each individual razor by spreading it out. You still have to deal with corrosion, but that acts slowly and can be prevented if you use the proper precautions and follow our maintenance advice. Thus, with two razors, you only have to send each razor in every other year if you stretch it out at a cost of $30 per year for sharpening including shipping both ways via priority mail. If you prefer a six month sharpening interval, having two razors is still only $40 per year if you take advantage of our $10 re-honing, less if you combine shipping or use first class mail.

It is the Greenest Way to Shave

By switching to a straight razor, traditional soap, and a brush you are reducing your environmental impact to essentially zero. That’s right, zero. If you buy a vintage straight razor, you aren’t even adding emissions from the manufacturing process. Okay, perhaps making the soap & brush emitted a small amount of carbon. Either case, the act of shaving has virtually no impact on the environment. No landfill waste and no CFC’s from aerosolized shaving goo means straight razor shaving is the greenest way to shave.

Your only environmental impact is the energy used to heat your water and ship your razor for sharpening (unless you sharpen it yourself). Although you could in theory use cold water in theory, in practice that’s just punishing yourself. And if you’re worried about the badgers killed to make shaving brushes, you can sleep easy knowing that they are actually a pest and a nuisance to the Chinese who cull the badgers. The Chinese are also reported to harvest the meat as well as the hair. And if you’re still concerned about junk yard waste from one straight razor, you can rest assured. With proper honing, your straight razor will last you several lifetimes depending on its original width.

Luxury, Craftsmanship, & Meditation

The open razor shave offers unparalleled luxury, craftsmanship, and a zen-like experience. The luxuriousness of a traditional straight razor shave cannot be over stated. From the hot lather on your face, to the smooth & irritation free shave, you cannot experience a better shave. Add the hot towel and face massage and your truly in the lap of luxury (okay, you can’t do a face massage yourself). If you haven’t experienced one yet, I highly suggest you to find a local barber to do one for you. You won’t regret it.

The craftsmanship of a straight razor cannot be understated. So much hand grinding, forging, and assembly is required for each straight razor. Each straight razor is more like a unique handcrafted piece than a mass produced identical copy made from molded plastic or metal.

Shaving with a straight razor is a zen-like experience. It requires extreme amounts of focus and concentration to truly master. You have to shut out the rest of the world and enter a zen-like state, focusing on the razor, the feel, the angle, and the shave. Shaving with an open razor requires you to slow down your day and focus. After mastering the art you may start noticing yourself entering a zen-like meditative state.

Straight Razor Shaving is the Best Way to Exfoliate

Forget chemical peels, micro-derm abrasions, and laser resurfacing. We have something better. A razor sharp piece of metal scraping away all our dead skin cells. That’s right, simply by shaving our faces each day we are exfoliating and doing it rather effectively too. Yet, nothing is as effective and irritation free as a straight razor.

Exfoliation is simply the removal of the top layer of dead skin cells. The act of shaving with a blade does just that while removing hair at the same time. A straight razor does it better than a DE or cartridge razor because of the sharper edge and guard free operation. Without all the “safety” features, it’s just the blade and our face. Nothing there to interfere with the operation of the razor.

Accomplishment & Exclusivity

The sense of accomplishment upon completing your first straight razor shave without cutting yourself is beyond words. While this was once the only way to shave, open razor shaving has become a lost art practiced by only a handful of men and even fewer women. Nothing should detract from the accomplishment that is mastery of the straight razor. It may take several months, but once you get there, it is incredible. Not only is it a great achievement, but you’ve just joined a very exclusive club.

The ranks of open razor users represents only a tiny fraction of the population. For women, the numbers are so miniscule that it is impossible to get an accurate representation. While many men try their hand at straight razor shaving for a variety of reasons, only a few go to the lengths required to truly master it. Spend the time needed to master the craft of artisan shaving and you will join the ranks of the men who came before.

It’s the Manliest Way to Shave

Nothing evokes manliness than a straight razor. While shaving in general is marketed to and considered by many to be a man’s thing, a straight razor is one of the few manly tasks that is still a man’s activity. Which isn’t to say women cannot, have not, or should not partake; just that the vast majority of straight razor users are men and a cut throat razor still evokes manly thoughts. No other method of shaving is so masculine as the straight razor. Not only that, but mastering this exclusive art adds another notch into your manliness stick.

How to Use Your Straight Razor Like Sweeney Todd

Do you want to wield your razor with expert hands like Sweeney Todd? If you do, read on. This article is a guided tour of how the pros grip and handle their straight razors. From the most basic of grips to the most advanced of strokes, we cover it all. We will teach you how to get the most out of your straight razor shave.

Make sure you’ve already read our First Straight Razor Shave Guide and our Ultimate Straight Razor Shaving Guide.

How to Hold the Straight Razor

My straight razor shaving guide only covers the most common way to grip a razor. Yet, there are infinitely many different ways you can hold your straight razor. In addition, the against the grain pass requires a different grip altogether. I should note that there is no one right way to hold a straight razor, you can grip it however you want as long as it works for you.

Click To Enlarge Pictures

All grips start similarly to what is pictured above. After opening the razor as pictured, position your hand accordingly. Most people grip the razor thusly, with their index and middle fingers on the blade side and their ring finger on the tail. The pinky finger is left floating, or if the tail is long enough, on the tail. The end result looks like thus:

As you can see, the blade is securely held by the thumb, middle, and index fingers. The ring finger is there for additional control and balance. This grip is meant for downward passes only. If you try to shave in an upward direction you will find that it just doesn’t work like that. Below you will find alternative angles for gripping the razor.


The picture on the left has the pinky finger resting on the tail. For people with either very large razors or large hands, this grip works better. For large razors this grip works because the weight of the razor is more easily controlled by having all three “main” fingers on the blade side, offering more control over the shave. This grip does require a little more dexterity and input from your little finger however. The grip on the right is probably the least commonly used grip. That said, some people do prefer it. Try it if you find the other grips uncomfortable or unwieldy. Only the index, thumb, and middle finger are used in this grip. Personally, I don’t like it, but some people swear by it.

The across the grain (XTG) pass uses the exact same grips. Some people prefer using an ATG grip, but these grips work just as well.

The Against the Grain Grip

The against the grain grip is not quite as formulaic as the downwards grip. Because we have to move the blade in an upwards direction, we must adapt the razor to a position not quite natural. However, once you master straight razor shaving, it is the most natural extension of your hand and razor. Let’s take a look at the most common method.


As you can see, the grip is very similar to the WTG grip, only inverted or upside down. The second picture shows the same grip with the thumb out of the way. Let’s look at a few more ATG grips. You will notice that they are all pretty similar. They all involve the thumb and index finger doing the majority of the controlling.


These grips don’t really need terribly much explaining as the principle is identical. Control the upwards motion of the straight razor using the forefinger and thumb while utilizing the other three fingers to help steady the rest of the razor. Experiment with these grips and find the one that works best for you.

The Strokes

The razor strokes are how you use the razor. The stroke that is always taught is the simple push stroke. The razor is simply pushed forwards in a straight line. While this technique works well, it has its drawbacks. It is not the most effective stroke. As I will show you, the following strokes work much better, but are also more complicated and not as easy to pull off.

Diagonal Push


This stroke is simple. You just move the razor in a diagonal direction. As you can see in the pictures (if you click to enlarge them) is that the razor starts in an upper right position, and is then moved downwards and to the left. This stroke works in all directions: left, right, up, and down. And while it does work backwards, it is infinitely easier and advisable to only lead with the tip. This is a pretty simple stroke, but it is also a dangerous stroke. Many cuts happen when the uninitiated try this stroke on their face. It is a lot harder to master than you might think. While it is simple in principle, in practice it has a tendency to cut if time is not spent to master it properly.

This stroke works because of the slicing action it imposes upon the hairs. The slicing action works because it increases the lateral forces acting upon the hairs and concentrating force at their roots. For a more thorough explanation, check out these links: cutting edge formulas and the physics of cutting. Regardless of why this stroke is more effective, all you need to know is that it works.

Slicing/Scything


This stroke starts off with the razor held horizontally. The razor is then pivoted at the grip point. The benefit of this stroke is that it concentrates the cutting action towards the tip. Read my article on the physics of cutting for the reason why this is optimal. To summarize, by concentrating all the force at the tip, the razor is better able to cut through the hairs. To accomplish the scything stroke, rotate your wrist. Again, this is an advanced stroke. Do it in the air many times before trying it on your face. Move the razor down and repeat as necessary. The same principles apply with the ATG stroke.

A backwards scythe will also work if you pivot at the point and lead with the heel. Although it’s not as easy to pull off, it is helpful for tricky areas where the tip won’t go. This is a very advanced technique and difficult to pull off because your wrist is not made to rotate in that direction.

Final Thoughts

And that’s it. An illustrated guide on how to handle that razor. I hope this article helps you to nail down that ever important grip and find the one that works for you. Remember, there is no right way to shave with a straight razor. There is only the way you shave with it. As long as it works for you, no one can tell you you are wrong. These guides are only a best practices recommendation.

Before trying to master any of the strokes depicted here, I highly recommend mastering the regular push technique first. The advanced strokes really like cutting into your face as well as cutting hairs. So, mastery of the straight razor is key to avoiding unnecessary nicks and cuts. But, once you’ve mastered these strokes, you will have mastered straight razor shaving.

Getting Started with Straight Razor Shaving

Shaving doesn’t have to be painful and annoying, it can be one of life’s small pleasures. Once you’ve become proficient with the razor, you can start enjoying the closest and most comfortable shaves of your life. You can also start enjoying the Zen of straight razor shaving. Instead of rushing through the daily ritual and trying to hack away facial hair and skin, you can look forward to shaving and the joy it provides you on a daily basis.

Learning to shave with a straight razor is a huge accomplishment. I’m not going to lie to you and say it is easy. But it’s not terribly difficult either. While some people consider it to be an “art,” this was the exact same shaving method used by our great grandfathers and possibly our grandfathers. If they could do it, we can too.

That said, you shouldn’t go out and dive in head first. Like all good and worthwhile things in life, learning traditional wet shaving takes time and patience to learn it right and avoid mistakes. After all, you didn’t run before you walked, and before you walked, you had to learn to stand. It is the same thing with a straight razor. You cannot just jump right in like a modern cartridge based razor, nor is it as easy as a Double Edge razor. Admittedly this is exactly why straight razor shaving has died out as a normal method of shaving.

Here are some tips to help you get started.

Practice Makes Perfect

I know you’ve been told this over and over again throughout your whole life, but it is true. Without muscle memory, we are basically just stumbling around doing things haphazardly. While a straight razor is much more elegant than a knife, in the larger scheme of things, shaving with a straight razor is one small step away from shaving with a knife. Don’t believe me, check out this video.

So, unless you want to regret ever trying to use a straight razor, I suggest you follow my advice.

Get to Know Your Razor

Feel how it balances in your hand. Try different grips with it. Slice the air, wave it around (safely), or shave your arms and legs. Whatever you do, just get used to how it behaves. 90% of straight razor shaving is controlling the angle. If you can’t control the razor, you won’t get a good shave.

The best way I have found to learn proper angle & holding technique was to shave the back of my hand. Doing that once a day for a few days taught me how the razor worked, what angle was necessary to achieve a cutting action, and most importantly it familiarized me with the razor. Another good technique is to practice the razor strokes in the air. Yet, another technique suggested to barber school students is to shave a balloon or tomato. If you use a balloon, you might want to consider lathering with water only as it could explode.

Now, it is a good idea to shave with both hands. However it is not necessary. I’ll show you how to shave with only one hand in a later tutorial. But if you can master the non-dominant hand, you will find it to be vastly superior, allowing you to shave tough spots much easier.

Each razor has its own balance point. This is affected by things such as blade width, scale material, scale shape, blade shape, hollowness, etc.. Keep trying different grips on the razor to find the one that works best for you. Remember, it is your razor, not mine. You can shave with it however you want. Or, you could use a cleaver like the fellow above. I should note at this point that you will need a separate grip for shaving against the grain. So learn at least two grips for your razor.

Start Off on the Right Foot

Many people start off on the wrong foot. They don’t want to invest the money necessary to start off well, fail to do any preliminary research, or trust the advice of someone who doesn’t actually shave with a straight razor. What happens is that they buy a razor made in Pakistan or some other low quality manufacturer. The second most common mistake is that someone purchases a vintage straight razor without having it properly restored or sharpened.

Don’t skimp on quality. Either buy a professionally honed razor or send your razor out to be professionally sharpened. Look, you wouldn’t shave with a knife would you? Well, if you would, you shouldn’t be wasting your time reading this. For the rest of us, we want a comfortable shave. A shave ready razor is the minimum sharpness level you should be shaving with for maximum comfort. A professional sharpener ensures that shave ready means the razor is honed and tested to ensure it will shave properly. We strop your razor prior to packing it in a light coat of mineral oil and placing it in a plastic bag to ensure 100% sharpness during the shipment back to you.

It’s All About the Angle

Using a cut throat razor is all about the angle. Too high and you end up scraping skin and pulling hairs. Too low, and you won’t cut anything. A truly sharpened razor will be able to shave with a minimum of angle, depending upon the hollowness of the razor and spine wear.

The most recommended starting point is 30°. This angle should not be the starting point, but should be used as a maximum suggested angle. If you’re finding that your razor needs more than 30° to shave properly and is not a wedge, it needs sharpening.

While attaining a 30° angle may seem simple, the truth is that it’s actually quite difficult for many people. The most common mistake is to underestimate the angle you’re using or to gradually increase the angle without knowing it. This is especially true when shaving the chin. Using a higher angle than necessary is what causes irritation, pulling, and scraping.

Below are examples of a few angles, all 30° and under. The angle reference is measured against the legal pad.

A Quick Primer on Stropping

Stropping does two things: realigns the edge and slightly sharpens the razor. I say slightly because the amount of metal removed is measured in microns after a marathon stropping session. A strop is a piece of leather used to “back hone” the razor. Cotton or linen strops are also used and are recommended. A strop is not necessary, but unless you want to be sharpening your razor every other week or once a month, you should invest in one. Click here for some ideas on low cost alternatives.

Quick note: If you’re trying to save money and are not sure you want to stick with a straight razor, I suggest not purchasing a real strop until after you become committed. Use a leather belt instead.

Stropping should consist of 100 back and forth strokes on a leather strop prior to shaving. You can strop the night before, but for optimal results, strop right before you shave. The spine of the razor leads the blade, otherwise you’ll cut into the leather. Flip the razor over by rolling on the spine. To avoid cutting into the strop, start the roll just before you stop the stroke. That way when the razor comes to a stop to go in the other direction, the edge will be off the leather, minimizing the risk of cutting. Also, don’t lift the razor up. That is bad. Click for a more detailed guide on stropping.

Beard Prep is Key

As the title says, beard preparation is the key to a successful attempt at straight razor shaving. Skimping on preparation will only cause unnecessary trouble down the road. That said, if you don’t have the time, you don’t have the time.

Many people shower or wash their face right before they shave. This is a good practice. Not only does the soap and water clear any dirt on your face, but the hot water will seep into the hairs and soften them. Making for an easier cutting medium. Another option some people use is the hot towel method. You know, the same method used by luxury spas or shaving barbers. To replicate the luxury, microwave a damp towel and wrap it around your head. Make sure you don’t microwave it too hot, you don’t want to burn your face.

Some men prefer to go a step further and use a pre-shave oil or cream. Recommended products can be found in our straight razor shaving equipment guide. Still others utilize both a pre-shave oil and do a pre-shave lather. A pre-shave lather is just that, a lather that you don’t shave with. You just let the lather sit and soak for a few minutes prior to wiping it off.

Whatever you choose, what’s truly important is that you stay away from canned goo. Not only does it cost you money and kill the environment, but it doesn’t work as well as traditional shaving soaps. Investing in a quality brush and soap will pay you dividends in the long run. Our favorite soaps can be found here. Not only in better shaves, but in savings as well.

Your First Straight Razor Shaves

Before you begin shaving with a straight razor make sure you will not be distracted. Turn off your phone, lock the door, put the kids to bed, send the wife out to get groceries, etc.. This is extremely important because distractions are what leads to bad cuts. Now, take a breath and heed the following advice.

Shaving with a straight razor is not a competition, not even against yourself. You get no points for finishing faster; in fact if you rush the learning process, you will develop bad habits. If you don’t manage to finish, you are not alone. In fact, I don’t recommend you attempt to shave your entire face or try to achieve a “normal” shave for your first straight razor shave. While some people are skilled enough to do so, there is no reason you have to. There is no stigma attached to finishing with a DE razor. If you don’t finish with a straight, you haven’t failed. In fact, you took your first steps to a better shaving method.

Learning to shave with a straight razor isn’t something that happens overnight. It takes a certain amount of skill and familiarity with the razor to perform properly. Go slowly and train yourself to handle the straight razor properly. Once you have mastered the art, you’ll never look back. You will join the ranks of the few and proud straight razor users. Trust me, the work is worth it.

For your first shave, I recommend you just try to shave your cheeks and only with the grain. If you’re feeling adventurous, try an across the grain pass. But by no means should you try to do an against the grain pass. Doing an against the grain pass is extremely difficult with a straight razor and is where all weepers come from. Don’t worry about getting the offhand side with your offhand. Shaving with your non dominant hand is extremely difficult.

For your second shave, you should try to shave a little more. Don’t worry if all you can accomplish is shaving your cheeks. Your off-hand is likely lagging far behind because of lack of use. Again, not an issue. If you have to shave using only one hand, that is acceptable. There is no right way to use a straight razor. All your trying to accomplish for the first few shaves is two things: 1) just getting comfortable with the razor, how it feels, and how to use it; and 2) whether this is something you want to stick with.

The next area to add is the section from your jaw line to neck. This is a difficult area. Most men’s beards grow downwards, so use a downwards (WTG) stroke. Focus on your dominant hand first. Don’t try to use your non-dominant hand. Meanwhile, continue shaving slowly and working on your non dominant hand and mastering the WTG pass. I’m not going to tell you not to do an ATG or XTG pass as it’s up to you, but if you don’t manage to do these, you are not alone. You are also not alone if your offhand learns extremely slowly. It took me six months for my left hand to catch up with my right hand. Even today I still shave with my right hand where shaving with my left presents no clear advantage.

The next area to tackle is your chin and moustache area. These are the most difficult areas to shave. I recommend not tackling these areas until you are getting good results from the other areas.  The only personalized advice I can give you is that each chin is different. What works for me might not work for you. The best advice I can give you is to go slowly, and use a lot of trial and error. For the moustache, I highly suggest only going for an XTG pass. Some people report that it’s possible to get baby’s butt smooth on your chin with just a couple of WTG pass.

The rest of the learning process is rinse, lather, and repeat. Once you’ve mastered the WTG and XTG passes, you can then move on to against the grain. With practice, dedication, and concentration, you will achieve the perfect shave. Shave on my friends!

How to Shave Like a Man and Combat Acne


This article is a continuation of our two part series: The Ultimate Guide to Shaving with Acne. This section covers the actual shave and post shave steps to help prevent new breakouts. Read part 1 here.

After excellent beard prep, it is time to actually shave. Having ditched the multi-blade cartridge, it is time to pick up your new straight or double edged razor and shave. Follow our advice below and you will combat new breakouts and have better skin.

The Actual Shave

Regardless of the source, all experts agree only doing a with the grain pass is recommended. Now, if you want a closer shave than this, don’t go further than across the grain. If you decide to forgo my advice, shave against the grain at your peril. A single pass is good enough for most teenagers. Adults with acne may decide to shave against the grain if you only have a few pimples. If you don’t know which direction your hair grows or what against/with the grain means, consult the below picture.

After the beard prep stage, it’s time to lather. If you decided to try wet shaving, you may think about lathering before you lather. Meaning, lather your face, wipe it off after five minutes, and lather again. This allows the lather to soak into the skin and soften the hairs even further. If your having trouble shaving comfortably or closely, then try this method.

If you only have a few pimples or a mole, then the simple solution is to not shave the area. Same goes for serious breakout areas. Just don’t shave it. See a dermatologist or wait for it to pass. The hard partof avoiding shaving pimples/acne is that the lather covers them up. The simple solution is to remove the lather in the area. If you use a straight razor, it’s as easy as rotating the tip of the straight razor like a drill on top of the area to remove the lather. If your using another method, your finger works too.

In planning the shave, some sources recommended shaving the moustache and chin last so the soap and water have more time to soften the hairs. Following this step should make shaving those areas a little easier. If you decide to wet shave and find that the lather dries out before you can get to these areas, don’t worry, just dip the very tip of the brush in some water and add it to the lather.

Shave Lightly and Only “With the Grain”

The actual shave is not too different than normal. But, as the section title says, shave lightly and only with the grain. Shaving lightly is recommended because it helps reduce cutting pimples tremendously. Using a straight razor and controlling the angle and pressure, you can actually shave right over acne without cutting pimples. This, however, takes a certain amount of skill with a straight razor. Not recommended for the uninitiated. Learn more about straight razor shaving here.

It is extremely important to not go over the area again. The more passes you make, the greater the chances of cutting pimples. Don’t try to get that one last hair. It’s not worth the extra time spent doing first aid when you do cut it. In addition, they always tend to flare up again, 10x worse if you fail to keep the area sanitized. Trust me, I am much more familiar with this subject than I want to be.

Shaving with the grain will leave you with stubble. Shaving is after all, beard reduction in phases rather than chopping off all the hair at once. Well, you could do it, but it’s extremely uncomfortable and your face will not like you. If a with the grain pass does not leave you with a close enough shave, then you can proceed with an across the grain pass (XTG). This means cutting the hairs perpendicularly. For example, if your beard grows downwards, across the grain means going from a left to right or right to left direction. Again, don’t use a lot of pressure to reduce the pimple cuts.

If a XTG pass is not enough beard removal for you, I highly recommend you stop and proceed to the post shave steps. However, if your job requires it, then proceed to the against the grain pass (ATG) with the following advice. If you do choose to make an ATG pass, then you must use a traditional shaving method. As mentioned in the first part of this article, a DE or straight razor gives you infinitely more control over the shave. In addition, the blades are sharper and will cut more and irritate less. Again, a straight razor is even better than a DE.

The same advice applies for ATG than all the other passes. Except that you *must* avoid pimples. Shaving ATG is a certain way to cut into any breakouts you may be experiencing. So, shave well and go lightly. If your using a straight razor, reduce the angle.

Post Shave

The post shave routine is even more important in preventing new breakouts. The first thing to do is wash off your face with cool water. This will help seal up the pores and prevent new irritants/infection. The next step is to kill off any bacteria left on your face. Sea Breeze acne astringent gets the best reviews and recommendations of any astringent I found. I personally don’t use an astringent anymore.

Many facial care providers try to sell you alcohol free antiseptic solutions for using on your face after you wash it. While these can help prevent breakouts, they’re pretty darn expensive. Never fear, our forefathers had that figured out too. After the shave, they used something called an alum block. An alum block is exactly that a block of alum. Alum is an antiseptic and anti-hemorrhaging agent. Thus, it’s great for both stopping bleeding and disinfecting your face. An alum block has the added benefit of sealing up your pores as well. There’s no reason alum block usage must be limited to your beard area.

If using an alum block is not for you, then use one of the following antiseptic products. Using an antiseptic is important because after the shave, your pores are opened up due to the hot water and lather. I suppose you could shave with cold water, but that’s just unnecessary pain.

ALUM BLOCK
Taylor of Old Bond Street Alum Block
$16.98

7 Amazon.com reviews
OIL FREE ASTRINGENT
Sea Breeze Astringent (3 Pack)
$14.75

21 Amazon.com reviews

Moisturize. Men do it too.

After disinfecting, the next step is to moisturize. This is important because after you’ve washed your face and shaved, you have no oils. Your face will detect this and go into oil production mode. This is bad because oil + dirt + pore = acne. So, moisturize your face and tell your oil glands to chill.

Any non oil based moisturizer with SPF is recommended. While the SPF doesn’t exactly help prevent acne, it does protect your face from the sun and premature aging. It’s an investment into your future you want to make. Besides, if you’re going to use a moisturizer, might as well wear something with an added benefit.

My Recommendations

I’ve spent a lot of time researching how to beat acne. More time than I care to admit. All the sources agree that skin care is the basis of prevention. All sources also agree that only two products have been clinically proven to reduce active acne: benzoyl peroxide and salicylic acid. Proactiv is easily the most widely promoted acne fighting system available. However, you can easily replicate the treatment at a much cheaper price. I’ll show you how in a little bit. But let’s take a look at how Proactiv works.

  • Step 1 is a daily cleanser. You’re supposed to use it twice a day.
  • Step 2 is a revitalizing toner. Again, use twice daily.
  • Step 3 is not really a step, but rather an acne spot treatment. They suggest twice daily usage.

Looking at how these items work, you’ll notice that the cleanser and spot treatment use benzoyl peroxide as the active ingredient. Now, all of these products use benzoyl peroxide as the active ingredient. As you’ve just read, benzoyl peroxide and salicylic acid are the only two clinically proven treatments that work.

Okay, now that’s out of the way, let’s see how wet-shaving replicates and even surpasses the Proactiv treatment regimen.

Wash your face twice a day, no more, no less.

Use a gentle, oil free cleanser. Salicylic acid or benzoyl peroxide in the wash will not hurt, but these products do dry out the skin. Over-washing the face is just as bad as under-washing. You have to remove the dead skin cells that clog your pores and the excess oil that helps trap dirt. But, you can’t remove it all. Your skin needs the oils and moisture to remain flexible and healthy. If you have a lot of oil in the middle of the day, I recommend washing your face with just water and pat drying with a towel. It’s important to wash your hands first and pat dry, don’t rub. Rubbing spreads oil and dirt.


Purpose Gentle Cleansing Wash
$7.99

31 Amazon.com reviews
Cetaphil Daily Facial Cleanser For Normal to Oily Skin
$14.04

15 Amazon.com reviews

Exfoliate

Exfoliation is key. There’s no substitute. Your skin sheds layers upon layers of cells each day. These cells normally fall off and that’s it. But some become attached to oil and then clog your pores. Reducing the amount of skin cells on the surface helps prevent excess shedding and breakouts. Many facial scrubs are marketed to do this task. Don’t be fooled though, all exfoliation does is remove the top layer of skin. Think about that.

Shaving is a great exfoliant. If you don’t believe me, try shaving an area of skin without using lather or water. You’ll see a bunch of dead skin cells on the edge of the blade. That’s the razor exfoliating. Yup, you’re paying for a single use product when all you really need to do is run a sharp blade over your skin. That said, I’ll give exfoliating scrubs their due when talking about the other areas of your face. While shaving your forehead is possible, I doubt many people do it. And shaving your nose is just impossible. But there’s no reason to not shave the entirety of your cheeks.

Disinfect

Proactiv’s revitalizing toner is an astringent. It kills bacteria on your face, preventing new infections. Proactiv’s may contain other ingredients, I don’t know exactly what’s in it. Any alcohol free astringent will work. The goal of this process is to kill any surface bacteria. As I said above, an alum block will do the same thing. Of course, you don’t shave day and night, so an purchasing an astringent is a good idea. Sea Breeze is a good choice.

ALUM BLOCK
Taylor of Old Bond Street Alum Block
$16.98

7 Amazon.com reviews
OIL FREE ASTRINGENT
Sea Breeze Astringent (3 Pack)
$14.75

21 Amazon.com reviews

Don’t pop them!

Bursting whiteheads is just plain asking for it. Not only are you releasing millions of bacteria onto the surrounding area, but you’ve just angered your skin. Not only is the pimple likely to come back bigger and meaner, but now you’re going to have to continually disinfect and treat the area to ensure proper healing. And don’t get me started on the scarring…. Now, all that said, I’m guilty of having done the very thing I advocate against. I hope you learn from my mistakes, but if you don’t and find yourself popping them, at least follow the following advice.

But if you do…

Sometimes, acne bursts due to normal washing or you nick it while shaving. Hopefully that means it was ready to fall off anyway. Either case, basic first aid principals apply. Step 1, stop the bleeding & disinfect. I high recommend a styptic pencil or alum block for this task. Not only will it quickly seal up the wound, but it serves as an antiseptic. Highly recommended. After that, seal up the wound using liquid bandaid. I use New Skin. Then, twice a day, disinfect the area with alcohol and reapply the liquid bandaid.

STYPTIC PENCIL
Clubman Styptic Pencil
$1.35

8 Amazon.com reviews
LIQUID BANDAID
New-Skin Liquid Bandage — 1 fl oz
$4.59

5 Amazon.com reviews

Use Spot Treatments & Salicylic Acid

Benzoyl peroxide based products are the best I’ve found. The active ingredient is the same in most products, but I use either Glytone or Persa Gel. All sources agree that salicylic acid works. Most also recommend treating the entire affected area. Doing research, I found that all products contained the same % of salicylic acid. Neutrogena’s also moisturized. Added bonus. I’ve been using Acne Stress Control with good results for years now. It moisturizes, exfoliates (salicylic acid is the active ingredient in many exfoliating peels), and prevents breakouts.

DAILY TREATMENT
Neutrogena Oil Free Acne Stress Control
$5.99

39 Amazon.com reviews
SPOT TREATMENT
D.R. Harris Almond Shaving Soap Refill
$15.13

8 Amazon.com reviews

That’s it. Follow those recommendations and you will have better skin. I can’t guarantee an end to acne, but your skin will be healthier. My personal regimen is to wash my face in the morning, shave, then apply spf moisturizer. At night I was my face and apply the 3 in 1 Acne Stress Control. That’s it. I’ve had great success following this regimen. Of course, I’m not exactly 17 either.

I hope this article helps, share your acne fighting experiences below.

The Ultimate Guide to Shaving with Acne Part 1

Seeing as this is a straight razor blog, most of my readers are probably past their teenage acne years. However, adult acne is a persistent and insidious problem for some people. Not to mention nearly every single young adult ever to walk the face of the planet. So, for those of you suffering from any type of acne, this article is for you.

Preliminary Information

Acne is no joke. It affects millions of people in America alone. Follow this guide and your acne breakouts, nicks, & cuts will be reduced. You’ll also have better skin. A proper shave will help prevent inflammation in the hair follicles, aka shaving bumps (Pseudofolliculitis barbae). These bumps occur because of hair being trapped in the follicle, leading to infection and acne. Acne.com. Most sources agree that exfoliation helps prevent acne. These sources also agree that a non-alcohol astringent after the shave helps prevent acne as well. One person recommends Alpha Hydrox AHA Enhanced Lotion or Sudocrem Antiseptic Cream for a post shave routine. All sources agree that preparation is key. Using quality tools and ingredients reduces the likelihood of breakouts and makes shaving more pleasurable.

Now, on to the article.

Introduction

Acne is a problem I am intimately familiar with. While I did not have terribly bad acne as a teenager, I suffered through breakouts, blackheads, and pimples just like the rest of the world. As a young adult, I was dismayed to continue to have the occasional pimple. Usually connected to stress or bad eating, I continued to have acne for a long time. As you can see, I am intimately familiar with this topic and how to combat both teenage and adult acne. Reading this article, you will learn the best practices for shaving with acne, how to combat acne, and better facial care tips.

This article aims to be a comprehensive guide on how to shave with acne. It will cover the best shaving equipment to use, best practices, and post-shave routines. This article is broken into two parts for length. In the first part, I discuss equipment, wet shaving, and preparation. In the second part of the article, I take you through the shave, post shave routines, and what worked for my acne.

If you have very bad acne, seek professional help. You won’t regret it. If you can’t afford a dermatologist, strongly consider growing your beard out instead of shaving. For those with less severe or adult acne, read on for ASR’s shaving recommendations.

Modern Razors are Junk

The first razor most young men are introduced to is probably either the Gillette or Schick plastic cartridge based razor. So much marketing has been pumped into these brands that it is practically impossible to avoid using one when one first starts shaving. What the razor companies don’t want you to know is that a multi-blade razor is the worst way to shave. Not only can multi-blade cartridges spread bacteria, but they are made using the cheapest method available.

Let’s start with the unsanitary aspect. Multiple blades makes cleaning these razors impossible. An alcohol or disinfectant dip would work wonders in keeping these razors clean, but I’m willing to bet that virtually no one does this. In addition, the construction of the razor makes drying them out equally difficult; a bacteria friendly environment. Combine that with the general humidity of the bathroom and the razor isn’t looking terribly sanitary anymore.

Not only are these razors potential sponges for bacteria, they are not the sharpest tool on the market. Multiple blade cartridges work by first pulling up the hair and then cutting with the subsequent (and equally dull) blades. Perhaps Gillette and Schick can explain why a sharp razor pulls up the hair before cutting; or why a super sharp razor needs five blades to cut a single hair close to the skin. Herbert Goodheart, MD author of Acne for Dummies recommends against modern 2+ blade cartridges. Not only do these razors fail at shaving, they are extremely likely to cut any pimples/breakouts you might have.

The truth Gillette doesn’t want you to know is that a single truly sharp blade will cut the hair in one pass just as closely as five blades in a modern cartridge. In addition, the single blade will only make a single pass over your face, whereas a cartridge goes over your face two to five times in a single swipe. Doing the math, that is 2x-5x more likely to cut open and infect acne breakouts. Do yourself a favor and ditch the modern cartridges. Your wallet and face will thank you.

Not only are these multi-blade cartridges less than razor sharp to begin with, but they go dull incredibly quickly. Razor dullness increases the likelihood of cutting into breakouts – I keep mentioning this because cutting pimples is one of the worst things you can do. When I last used a cartridge over a decade ago, the instructions said to replace the cartridge every five days. While my memory may be foggy, I distinctly remember the cartridges going dull much quicker than the five day replacement plan. I also remember them being horridly expensive.

A better option than multiple blade cartridges are single use disposables. While not as sharp as other options, single use blades don’t run the risk of growing bacteria and since you only use it once, are slightly sharper. They do however, clog up landfills just as multi-blade systems do.

Electric shavers are probably the second most common method of shaving in the U.S.. However, they receive mostly negative, but mixed recommendations. Most sites only recommend them as a final alternative.  Best Acne Treatments says stay away from them altogether. Acne.com, however, recommends electric shavers. That said, some people report good results with an electric shaver. We recommend trying other methods first. Dry shaving is not good for your skin and neither are electric shavers. That said, electric shavers do have a much lower risk of cutting or irritating acne breakout areas due to the electric razor’s aversion to giving a close shave. A beard trimmer is a workable solution however; it doesn’t attempt to shave, but rather trims the beard.

DOUBLE EDGE RAZOR
Merkur Long Handled Safety Razor

279 Amazon.com reviews
DE BLADES
Feather Double Edge Razor Blades

56 Amazon.com reviews

Wet Shaving is Better

By far the best option is traditional wet shaving using a double edge or straight razor. Traditional wet shaving is so named because we use water and soap to create our lather instead of squirting it out of a can. Now, don’t get me wrong, squirting lather out of a can is extremely convenient. However, let’s think about this for a second. Shaving gel is canned aerosolized lather. Canned gel’s sole purpose is to lubricate the face so that the blades can cut hairs. Traditional wet shaving is a more intricate process that requires building the lather from water and soap/cream using a badger/boar/horse hair brush. Click here to learn how to shave with a straight razor from start to finish.


Benefits of Traditional Wet Shaving

  1. Better skin health
  2. Better exfoliation of dead skin cells
  3. Cleaner skin
  4. Greater control over the shave
  5. Lower cost over the long term
  6. Higher quality shaving products
  7. Protect the environment

Traditional wet shaving is better for the very reason that it is wet. Water-logged facial hair is infinitely easier to cut than dry facial hair. The limited water in canned shaving gel is there solely to make sure the lather is still lather. Wet shaving utilizes the water to both soften the hairs and build the lather. In fact, it is said amongst the wet-shaving community gurus that lather’s only purpose is to hold water. Not the other way around. Water provides both the lubrication and the softening agent. In fact, many straight razor shavers use only water for their final pass because it is slicker. The more water comprising your lather, the slicker the shave. Now, I’m not saying that shaving gel doesn’t work. It does. I used it for a long time with a straight razor before I made the switch to badger and soap. Which brings me to my next point: the act of lathering helps exfoliate and lift hairs.

By working the lather into the skin and beard, we exfoliate the skin by scrubbing away dead skin cells. This effect is magnified if you decide to face lather instead of bowl lather. I much prefer face lathering. Its quicker and gets more water on your face. In addition, while applying lather to your face by hand mats the hairs, applying lather by brush raises them up, making for a much closer and easier shave. Finally, traditional shaving soaps provide emollients to your face, moisturizing and lubricating your face.

While all of the above is great and all, perhaps the greatest advantage to wet shaving is the equipment. Unlike a multi-blade cartridge, a DE or straight razor is much less likely to grow bacteria. In the case of a straight razor, the odds are practically zero.

A DE comes apart into its constituent parts. A straight razor only consists of the blade and two scales which protect the blade and user. Cleaning these two time-tested shaving implements is simple and easy. Contrary to what some people think, dry steel is extremely inhospitable to microbes. While we here at ASR firmly believe that you should shave with a straight razor, because it is the best method of shaving, we also understand that it is not the easiest thing to learn. However, if there ever was a good time to learn a new skill, it would be when you first started shaving. That said, the DE makes an acceptable substitute.

What makes these two methods superior to modern cartridges and disposables is the blade quality. Double edge blades are still made using hardened steel. While not built to last like a straight razor, they are still miles ahead of plastic disposable razors. I am not going to explain why a straight razor is sharper than other shaving implements, if you want to learn more browse through my straight razor shaving articles. Suffice to say, straight razors can be even sharper than DE razors due to the better materials, manufacturing, and sharpening process/options.

PRE SHAVE CREAM
Proraso Pre Shaving Cream 3.6oz$13.005 STARS14 Amazon Reviews
PRE SHAVE OIL
The Art of Shaving Pre-Shave Oil, Unscented
$21.434.5 STARS38 Amazon Reviews
FACIAL WASH
pHisoderm Anti-Blemish Facial Wash (Pack of 4)

58 Amazon.com reviews
DERMATOLOGIST RECOMMENDED
Neutrogena Oil-Free Acne Wash, 9.1 Ounce (Pack of 3)

20 Amazon.com reviews

Preparation is Key

All authorities on the subject agree. Shaving prep is key to both preventing acne and making the situation worse. Preparation is extremely underrated in today’s world. Not only does a clean face mean less chance of contamination, but washing your face helps to soften the hairs, making for an easier shave. Water logged hair is softer than dry hair; meaning they are easier for the razor to cut through. In addition, daily facial cleansing and exfoliation is key to fighting acne breakouts.

It is essential that you prepare your skin for your shave. Wet hair is more than twice as easy to cut than dry hair. Warm/hot water will soften your beard, resulting in a much more comfortable and less irritating shave. Probably the easiest way to achieve this is to shave at the end of your shower or immediately after exiting the shower. If you can’t manage to shave after showering, try to wash your face before you shave at least.

Each person’s face is different and will respond to different cleansers differently. Choose the right one for you and use it as recommended. Twice daily is enough for most people. And since your already washing your face, you might as well take the time to shave as well. Washing your face before you shave is a great way to prep your beard. You should really think about shaving right after washing your face. I’ll explain how you can save time using this method if you wet shave in a little bit.

The “luxury” barbershop shave method involves wrapping a towel around your face for five minutes, getting a facial massage, and lathering your face once to let the soap sink in before the actual second lather and shave. Obviously that’s a ton of time to invest. The better alternative is to shower. The hot water of the shower will do the same thing that five minutes of hot towel does. Although, admittedly I prefer the hot towel. Barring that, at least wash your face before you shave.

In addition to showering and/or washing your face, you should think hard about using some pre-shave products. While not necessary, users report good results from using these products. Applying a pre-shave oil before shaving will further soften the beard as well as assist with razor glide and offer more protection. Apply pre-shave oil to damp skin. You only need a few drops for your full beard. Massage the oil into the beard, going against the grain very gently. This will help lift your hairs.

If you are wet shaving, you need to soak the badger brush for optimal performance. If you don’t soak the brush, you’re going to have a hard time building a lather without constantly dipping the brush in hot water. Building a good, wet, lather will help the razor glide across your face rather than fight every single hair in a contest to rip your face apart. If you choose to forgo wet shaving, then add water to the canned goo of your choice. The additional water will make the lather slicker and better. Also, try to rub the lather into your beard going against the grain with your fingertips. This helps exfoliate and stick the hairs up. Again, a badger brush works infinitely better.

Continued in Part 2 Here.

The Ultimate Guide on How to Shave with a Straight Razor

Shaving with a straight razor is a daunting task for the uninitiated. Have no mistake about it, you are putting a well honed piece of steel against your skin. But have no fear, it is no more dangerous than any other shaving method if you do it properly. This guide will take you through all the items you need and those you really really want. It will take you through the ins and outs step by step and tell you how to get the best shave you’ve ever had.

Before you get started using a straight razor, please note that shaving with a straight razor has a steep learning curve. In all likelihood you will not get a better shave for a month or longer. However, once you master the straight razor you will experience less irritation, a closer shave, and greater comfort. Plus, it is the greenest way to shave and the most cost effective too.

Introduction

European Straight Razors (AKA cut throat razor, open razor) feature a fixed blade that folds into the handle. Japanese straight razors, known as Kamisori, are a single piece of steel. Once, the only method of shaving, straight razors have become a niche art, practiced only by a few. With the recession, the green movement, and other factors, there has been a growing move back towards straight razors and Double Edge (DE) razors. Concerns such as cost, nostalgia, and “manliness” drive people back towards the straight razor.

Once you master the art of straight razor shaving, you will be able to get a far smoother shave than you can get from any modern method. However, shaving with a straight razor has a long learning curve. While many people believe shaving with a straight razor is dangerous, the reality is that it is no more dangerous than a DE or modern safety razor; you actually have to try to cut yourself or massively mess up to do any real damage.

Even though the straight razor requires a long learning curve, the benefits are worthwhile. Stick with the straight razor even though the DE shaves better and you will be rewarded. If not with a closer and irritation free shave, then by the meditative, relaxing, and manly aspects of straight razor wet shaving. Stick with it and once you have mastered the straight razor (which typically takes around 100 shaves), you will be able to consistently give yourself a shave that’s far better than any shave you’ve ever had before.

Things You’ll Need

Recommended Items

Warnings

  • Schedule the time to learn how to use a straight razor properly. Do not attempt the job if you cannot focus.
  • Make sure you are not interrupted. The worst accidents I’ve heard about happen when the person is interrupted suddenly.
  • Never try to catch a dropped razor. Odds are very good it will cut you.
  • Dry your razor thoroughly. It will rust if you don’t.
  • Follow regular cautionary procedure you use with all sharp knives.

Tips

  • Always use a shave ready razor. A shave ready razor is deemed sharp enough to shave. If the razor is not shave ready, it won’t even cut arm hairs. Shaving with such a blunt instrument is not fun. Click here to see our razor sharpening & restoration services.
  • Use styptic pencil or alum block for cuts. You can purchase a 1oz styptic pencil here.
  • Hard shaving soap that comes in pucks or sticks are highly recommended. Creams are good too. Just don’t use canned goop. Traditional wet shaving soaps produce a much better lather and are generally slicker than anything that comes in a can.
  • Wet-Shaving (using hot water and a brush to make lather) is highly recommended.
  • You can use a boar bristle shaving brush if you’re on a budget, but a silvertip badger hair brush is more luxurious.
  • Getting a good shave using a straight razor requires a certain feel that you will develop over time. Your first few shaves may be worse than the shaves you get from a DE razor, but with time and practice you will get the kind of baby’s-butt smoothness you can only get from a straight razor. If you want a little scruff on your  face, you can avoid getting such a smooth shave, and also save time, by doing a single-pass shave and skipping the across-the-grain and against-the-grain passes.
  • It is recommended to only do a with the grain pass your first few shaves and either finish with a DE/disposable or go as is.
  • Don’t store your razors in the bathroom if you can avoid it. Follow our straight razor care guideHumidity is the death knell of razor edges. The water in the air rusts the edge and breaks it down rapidly.  If you must store your straight razor in the bathroom, wrap it in wax paper and place it in a waterproof container. Before doing so, thoroughly dry your straight razor of all water.
  • Click here to learn more of our straight razor shaving tips!

The Step by Step Process

Prepare the water and soak the brush

First, prepare the water and get your brush soaking. The goal is to use hot water, not scalding hot water. A good rule of thumb is that you should be willing to place your hand in the water, if only for a few seconds. A scuttle will keep the water and lather hotter longer. We prefer using filtered water, or at least soft water. It really helps with the lathering process.

Once the water is heated and in your shave bowl or in your sink if you use that method, place the brush in the water. If you can avoid dunking the handle, try to do so. It helps prolong the brush’s life.

If you are using canned goo, and I hope you aren’t, skip this step.

Prep your beard, either by taking a hot shower, or by holding a hot towel against your face

This is important because as your hair follicles absorb water, they become pliable and easier to cut. This step is unnecessary, but highly recommended. If you opt for the hot towel; soak a small towel in hot water and hold it firmly against your face until it is cool. For best results, apply the hot towel twice. Alternatively, you can microwave a wet towel.

Apply any pre-shave oils to your face at this time.

Apply the lather to your face

Some people prefer to face lather, others prefer to build the lather in a bowl, and still others still use canned shaving cream. Whatever you choose, apply the lather to your face. Make sure the lather is very slick. You can increase the lather by increasing the water. If you use a badger brush, you can dip the brush slightly in the hot water.

Click here to learn how we lather.

(Optional) Let the lather sit for a few minutes and reapply

Using a hot towel, wipe off the first lather and then reapply. Re-moisturize your brush and lather if necessary. We do not follow this step, but professional barbers and some straight razor users do. If your beard is coarse, we absolutely recommend following this step.

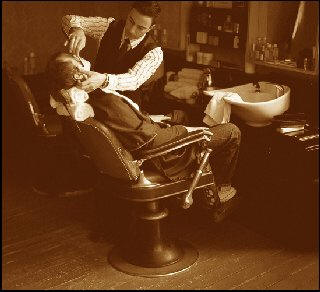
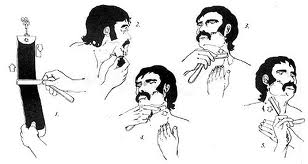
Get a firm grip upon your razor

Most users use the three finger grip or four finger grip. Most straight razor grips position the scales in between the middle and ring fingers. Some users prefer to straddle the scales between the pinky and ring fingers. This is personal preference.

Use a 20°-35° degree angle of the blade to your skin. 35° is the greatest angle you should be using.

20° is a good starting point. Another tip is to lay the razor flat against your skin and raise the spine up two millimeters. Increase or the angle as required.  Remember you are not trying to dig into your skin with the blade. You are using your skin as a cutting board of sorts and slicing the hairs, not your face.

Stretch your skin; watch this woman as she shaves a customer

http://youtu.be/KlBvY5QOX3Y

You will make three passes for optimal smoothness

  • The first pass is with the grain. The goal is beard reduction, not removal. You will have a slight shadow if you do this pass correctly. While it is advisable to stop at this point for your first few shaves, proceed to the next step if your feeling extra confident and have excellent control over the razor.
  • The next pass is across the grain. Again, beard reduction, not complete removal. You will still be able to feel the hairs at this stage. It is very highly recommended to stop at this point for your first few shaves.
  • The final pass is against the grain. This is the hardest pass. It requires a good amount of skill and a moderate amount of dexterity to perform correctly. You are aiming to remove anything that is left during this pass.

Make the first pass with the grain (in the direction of hair growth).

With the grain gives the least resistance when you run your hands in the same direction across your beard. It is important to determine the direction of beard growth. The following method is how I personally shave. You can switch up the order in any way you wish. There is no reason you have to shave the cheeks before your neck. However, following this method makes life a little more organized.

Shave the Right Cheek

Since most people are right handed, we will start with the right side of the face. Grasping the razor as shown above, make a downward stroke (blade first) holding the blade at a 30° angle to the skin. The angle is subjective and will change based upon your hair growth and razor sharpness. Use the lowest comfortable angle for best results.

As you can see from the picture, skin stretching is essential (unless your face is perfectly taut). To stretch the skin, follow the picture. You are pulling upward and drawing the razor downwards. In other words, pull in the opposite direction of razor movement. As you shave downwards, move the left hand downwards as the lather is shaved away. Continue until you reach the jawline.

Shave the Left Cheek

There are two ways to do this side of your face. One method is to switch hands. If you choose this method, and any truly serious straight razor user does, just mirror the right side. Hold the razor with your left hand, pull with your right. I’ve mirrored the right side shaving image to help.

For those not so dexterous, follow the right side picture. As you can see, you have to change your plan of attack a little. Instead of shaving near the earlobe with the toe (tip) of the razor, you have to use the heel. Consequently, you won’t be able to get as close on this pass. The good news is that pulling with your left hand doesn’t involve reaching over your head. Anyway, just do the same thing on the left side as you did on the right.

Shave Under the Jaw

To shave under the jaw, tilt you head back to stretch the skin. Pull downwards at the bottom of your throat or pull upwards right at the jawline. The direction you stretch the skin depends upon your beard growth direction, direction you are shaving, and area you are trying to shave. Thus, pull downwards when shaving upwards and pull up when shaving down.

Shave the Chin

This is most certainly the hardest part. To do it, tilt your head upwards as before and pull down on your throat skin. It helps to shave the neck underneath the chin first. Then, placing the razor just under your bottom lip, shave downwards. Go slowly and take extra care. Not only is this skin extra sensitive, but your chin curves. Don’t go for extra close your first few times straight shaving. Just finish with a DE or disposable. Pride is not worth nicks and cuts.

The Upper Lip/Moustache

This area is almost if not just as hard to shave as the chin. Except that the upper lip is flat. The nose has a tendency to get in the way. To get around the nose, angle the blade so that the spine is touching your nose, then make a “scooping” motion to shave downwards. The XTG pass is much easier. The ATG pass is not difficult, but if done improperly can cause irritation. Leaving the mustache alone after the XTG pass is not a bad idea.

Lather up again, and make the second pass across the grain (sideways).

Repeat the above steps. Except this time, shave sideways. For example, when shaving the right side, hold the razor so that the blade is vertical, place it in the middle of your face, and shave towards your ear. Then shave the other side going the opposite direction. Repeat. I should note that an across the grain pass on the neck and chin is extremely difficult. We recommend skipping it until you develop more skill with a straight razor.

Make a third and final pass against the grain.

Beginners may wish to simply skip this step. Just perform the against the grain pass backwards. For example, on the right side of the face, shave upwards. You need to change your grip on the razor to accommodate the new direction. You also need to lower the angle of the razor until the spine is just barely hovering over the skin.

Rinse the lather off your face with cold water

Cold water will help close the pores in your skin.

Dry the razor

This is extremely important. If you fail to dry off all the water from the razor, your razor will rust and will dull prematurely. If you got water in between your scales, run a square of toilet paper between the scales

Dry the brush

More on this topic later, but suffice to say, dry the brush out as thoroughly as you can.

Physics of Shaving: Cutting Edge Formulas

In our previous post on the physics of shaving, we discussed what exactly goes on during the actual shave on the molecular level. To recap, the razor cuts through hairs because the force imparted by the razor overcomes the forces holding the hair together. The thinness of the edge magnifies the pushing force into a small area, enabling the razor to cut.This article will explain exactly how that works for those who are curious.

The basic physics law at work is Newton’s second law.

F=MA

In practical terms, the force behind the razor is controlled by how fast and hard we move the razor across our faces. Thus, to achieve maximum cutting force, we should strive to move the blade faster. In reality, the speed of the blade is absolutely restricted by the user’s skill and the threat of cutting into the skin. Put another way: move the razor too fast and your going to look chop up your face.

The other fact we can deduce from this formula is that a heavier razor will cut more effectively than a lighter razor. This is why wedge type razors are perceived to be better than hollow ground razors by some users. This also explains why 8/8″ razors are perceived to cut better. They are also popular the sheer size of the razor is desirable in itself to some users and collectors.

Back to the molecular level. We all know a sharper razor will cut through hairs more efficiently than a dull razor. This is because of the physics of pressure. Concentrating the force into a smaller area increases the level of force acting upon the hairs. The formula is below:


As you can see, the pressure exerted upon the hair increases as the edge radius decreases. Since reducing the edge radius decreases the surface area in contact with the hair, the force imparted upon the hair is magnified exponentially. However, the razor can only cut as well as the person handling the razor. We can decrease the edge radius to as small as possible, but ultimately, the F component is the key. If the user only uses 50% of their potential, the hair is only being cut half as effectively.

Looking at how razor dulling affects the forces exerted upon the hairs, we have to first define razor dulling. Razor dulling on the molecular level would be an increase in the edge radius (the thickness of the edge where 0 edge radius is a perfect razor). The above formula shows that a 10% increase in edge radius imparts a loss of 9.09% of the pressure acting upon the hairs. A 50% increase in edge radius results in a loss of 1/3 of the pressure. As you can see, the skill of the user is vastly more important than the sharpness of the razor.

So, to sum it all up: The sharper the razor, the greater the impact upon your shaving skill. However, the forces imparted by you are vastly more important than how sharp the razor is.

Did you like this post? Let us know in the comments below.

Inaccurate Portrayals of Straight Razor Shaving or How Not to Use a Straight Razor

I have no idea why Hollywood simply cannot portray straight razor usage correctly. Is it really that hard to find someone who knows how to use one? Can they not do some quick online research on how to hold the blade? Straight razor usage should be seemingly obvious, but as my experience and Hollywood pictures show, that is simply not the case.

Back in the 90’s, when I was buying my first straight razor, as I was asking the salesperson at the knife store about straight razors, another customer chimed in on their use. He was under the impression that you dragged the straight razor spine first across the hairs. He said that the razor was supposed to be so sharp that the hairs would just pop off. He even claimed that that was how his friend used his straight razor while camping. In case you were wondering, it doesn’t work.

Perhaps these people got their incorrect beliefs from Hollywood. Just take a look at these pictures. Robert Duvall was part of the “Actors Acting” special by the NY Times. The below picture appears to be a promo shot.

Below is a screenshot from the HBO series Game of Thrones. What is interesting is that in the season’s first episode, one of the characters receives an accurate portrayal of a straight razor shave. Why they couldn’t get that same guy to give the other actor shaving tips baffles the mind. If your going to portray something, why not do so accurately or not at all?

And what is even more baffling about the Robert Duvall photo is that Robert Duvall himself clearly knows how to shave with a straight razor! Check out the video below of the actor using the razor correctly. Clearly the photographer or someone thought that it would look better to have Mr. Duvall show people how to gouge themselves with a straight razor! Clearly the razor is dull otherwise Mr. Duvall would be bleeding all over the photo set from the promo shot. He’s also clearly not really shaving in the video since there is no hair removal.


What are your thoughts? Do you think the media unfairly portrays straight razors? Tell us in the comments.