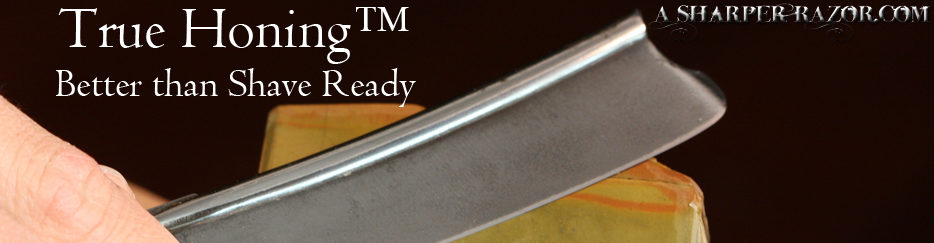
Straight Razor Sharpening Video
Leave a reply

For many people, the thought of purchasing a sharpening stone along with their straight razor is second nature. For some, this is exactly what they want. For many others, it is a terrible decision. This article will explore why you should, and why you shouldn’t, buy a sharpening stone for your straight razor and start sharpening your own straight razors.
First things first. You don’t need a sharpening stone. With the rise of globalization, you can send your razor out to be professionally sharpened. This honemeister (master of hones) will do an incredible job and ensure your razor is beyond shave ready. Secondly, hones are expensive and require a massive amount of time to learn proper sharpening technique. As such, the only real reason you should even purchase a stone is to become self sufficient.
Unless you live in 19th century America on a ranch far from civilization, you do not need a hone. Even in the 1800’s men who could afford their own razor would take their razor(s) to the local barber for sharpening.
“There are hidden costs associated with sharpening stone ownership. In addition to the stone, you need to purchase a $110 lapping plate. If you want to do more than touch up your razor, you need more stones. A lot more stones.”
With the decline of the straight razor and the rise of the DE razor and now the modern multi-blade cartridge razor came the decline of the local barber and the art of straight razor sharpening. No longer can you simply walk down the street and have your barber sharpen your straight razor.
In today’s world, the mail in honemeister has taken over for the extinct local barber. Today it is now easier than ever to have your razor sharpened. Not to mention consistently better quality and lower cost.
Let’s face it, sharpening a straight razor is not a walk in the park. In fact, I wouldn’t even call it easy. I’d call it simple, but so is drilling out a cavity. As this article will discuss, the perceived benefits of purchasing your own hone simply does not pan out. The only real reason anyone should be purchasing a sharpening stone is if they want to be completely self reliant (or if you start restoring a ton of old razors).
The benefits of self sufficiency are self explanatory. If you don’t care about self-sufficiency, clearly honing your own razors is not for you. And while being self sufficient is vastly inefficient, it is its own reward. It is good per se for the man who wants to fend for himself. It is the only way to live for this man. There is simply no other option. The cost does not matter. To this man, I say, go forth and buy hones! Just try not to contract Hone Addiction Disorder and purchase an entire closet full of stones you may or may not use. Trust me, the person your living with won’t appreciate it too much.
“Sharpening a straight razor takes time and money, but it is not impossible. You can become self reliant.”
Self sufficiency is exactly why you should buy a hone. It is the only reason that adds up in terms of dollars and cents. You can learn to sharpen your own razor and you can purchase the necessary equipment for less than a high end computer. It’s not prohibitively expensive. So, if self sufficiency is your only goal in life, then read no more. Buy those hones and start learning!
 |
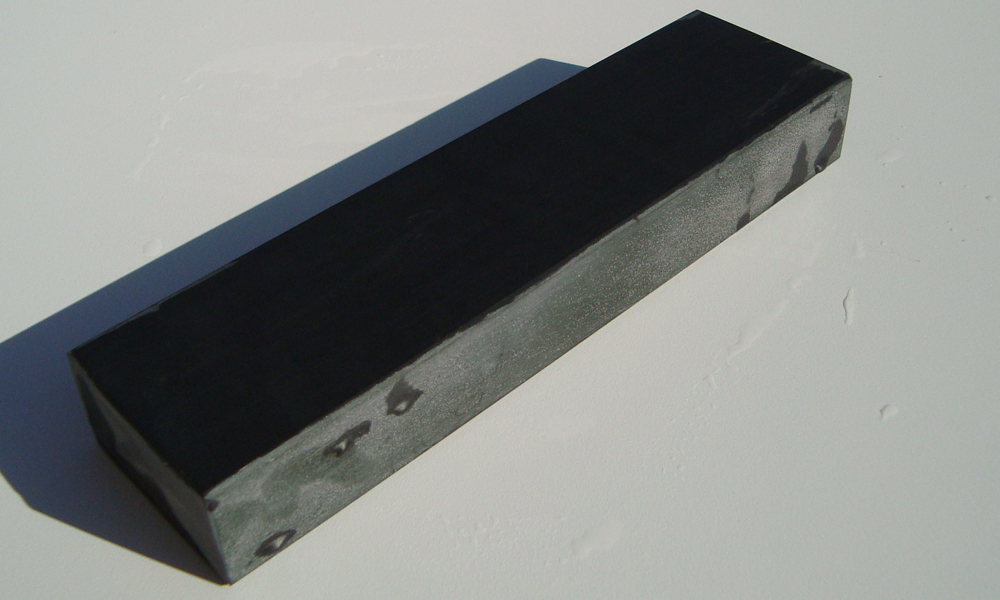
Norton 4000/8000 Grit Waterstone |
Many people think that purchasing a hone is cheaper. This assumption ignores even cheaper alternatives (read on to find out what they are) that provide the same or better results. It also ignores the time value of money, the value of your time, and the time required to recoup your investment. In the extremely long term, say 30-50 years, buying a stone and sharpening your own razors would be cheaper, but is a lifetime investment. Who knows what we’ll be shaving with 20 years from now; lasers? The truth is that buying a hone and learning to hone are extremely costly, both in terms of time and money.
“Not taking into account the ~10-20 hours of your time, at $16 per re-honing and accounting for the cost of lapping tools, the investment recovery time is 5-9 years.”
Let’s examine the most famous sharpening stone, the Norton 4k/8k. This stone will set you back $80. A better alternative is the Naniwa 12,000, which will set you back the same amount. A straight razor needs to be sharpened between 6 months to 12 months, depending on how well and often you strop the razor. If you strop like a fiend (200+ laps per day) you can push it to 1.5 to 2 years.
You can get your razor sharpened for $20. Shipping two ways is $6-$10. At $30/sharpening you will recoup your costs within 1.5-3 years. However, if you’re paying $20 to re-hone your razor, you are paying too much. You can get your razor re-honed for $10 if your razor was previously sharpened by the same vendor. And let’s face it, you shouldn’t be initially sharpening your own razor without a lot of experience behind you. At $16 per sharpening, the investment recovery time is 3-5 years. At $20 for priority mail, 2-4 years.
In addition to a hone, you need either: a lapping plate or a lapping surface + wet/dry sandpaper. A good lapping plate is between $120-$320. A lapping surface can be anything with a .0001″ flatness. You can purchase granite plates advertised as such for around $30-$70 depending on size.
“Adding up the costs for honemeister quality stones, the time to recoup your initial investment is going to take an entire lifetime.”
While a 12k Naniwa will put a fine edge on your razor, true honemeisters don’t stop there. The best use expensive and rare natural stones or similarly expensive synthetic stones. A Shapton 30k (the finest synthetic stone money can currently buy) costs $310. An Escher will run you anywhere from $120-$300. A Japanese stone can cost thousands of dollars for just one stone. Not all hope is lost, some people are perfectly fine with the edge off a 12k Naniwa.
For any task other than touching up an already sharp edge, a 12k is not going to cut it, and you don’t want to shave off an 8k if you can help it. Thus, you’re going to need more stones. And they all need lapping too.
Owning multiple razors does not make the hone pay itself back any faster. Your razor does not dull perceptibly if you don’t use it. If you own two razors, each razor only needs to be honed half as often. Three razors, a third as often; and so on. Owning multiple razors costs the same total amount, even though maintaining each individual razor costs less.
Time is our most precious resource. Learning to properly sharpen a straight razor is a matter of dozens or hundreds of hours. It is possible you already possess some of the requisite skills, but in most cases, dozens of hours is typical to achieve a workable edge. To even come close to the skill level of a honemeister will take you hundreds of hours and razors.
“Not only does the honing take a lot of time, but so does the lapping.”
What you can’t learn without thousands of razors and countless hours under your belt is how to handle problem razors. Honing is simple if your razor has a perfectly straight edge. All you really need to do is to hold the razor steady and push. Yet, for smiling razors, razors that need edge repair, or anything other than a perfectly flat edge, they require a special set of skills mastered only after putting in the necessary time and effort.
Whatever you value your time at, you have to spend time learning to properly hone a razor. If you don’t, bad things can happen. Check out these honing mistakes.
As I promised you at the beginning of the article, I’m now going to share the cheaper alternative with you. The not so secret “secret” is chromium oxide pastes and diamond sprays. While it doesn’t quite replace a hone, it will extend the time between sharpenings for extremely long periods, measured in years. Not only that, but you already possess the necessary skill: stropping.
If you are a responsible straight razor owner, you already own a strop. And you already know how to use it. All you have to do is purchase some chromium oxide paste/powder or diamond spray and, if you don’t already have one, a cotton/linen/felt strop (leather works too but is sub-par). If you already own a cotton or linen strop, you can use the back side and flip it over for regular stropping. To learn more check out our guide on pastes & sprays.
In conclusion, the only good reason for buying your own hones and sharpening your own razors is if you want to be self sufficient. Another reason is if you want to start restoring more than a few straight razors per year. The perceived benefits just do not pan out. Especially when you have such a cheap and ready alternative in pastes and sprays.

This poor razor has come to an early end due to poor honing technique
Sharpening a straight razor is no easy task. It takes skill, time, and patience. Not to mention the correct equipment. Otherwise, you end up with something like the razor pictured above. Unfortunately, it gets a lot worse. Sad, but true. So, let’s just dive in and talk about the worst honing mistakes and how they severely shorten your razor’s useful lifespan.
The toe is the tip of the razor. The heel is then, the back part of the razor where the bolster is. Excessive toe wear is by far the most common honing mistake in thousands of vintage razors. Sometimes, the toe wear was intentional. In other cases, the toe wear was a result of improper sharpening technique. Let’s take a look at some examples.
")

As you can see, the razor’s tip, or toe, has been sharpened more often than the rest of the razor. In other words, it shows more wear & tear. The underlying problem is just that: the toe has been sharpened more than the rest of the razor. Stated in another way, the toe has spent more time on the sharpening stone than the rest of the razor.
Compounding this problem is the use of a lower grit stone than necessary. In many cases, barbers would use barber stones to re-sharpen their straight razors for their clients. These stones were not of as fine a grit as is available today. Consequently, they took off a lot of steel. More steel than necessary. Thus, the razors would be prematurely ground down to a useless level.
The toe is subjected to additional wear & tear for two reasons: 1) the user uses the toe of the razor far more often than the rest of the razor and consequently sharpens it more often; and 2) the sharpener does not have the requisite skill level to properly sharpen the straight razor.
Let’s talk about #1 first. While you may think this is not a huge problem, it is still a mistake. Not only in the honing, but also in the usage of the straight razor. Care should be taken to utilize the entirety of the blade when shaving. You should not be using only one part of the straight razor. There is a reason the straight razor is typically three inches in length. In addition, even if you did use the toe more often than any other portion of the straight razor, there is no reason you should be using it so much that the rest of the razor remains completely sharp while the toe dulls. No practical usage will do that to a straight razor. No, the reason the toe receives so much wear is improper honing technique. Which brings us to reason #2.
Sharpening a straight razor is a trial and error process. The amount of trial & errors necessary to become truly skilled is immense. Perhaps thousands of hours is required. Even sharpening your own straight razor can take hundreds of hours to master. And each straight razor is different, having a different curvature, feel, and weight.
The reason the toe receives more wear than the heel is because the sharpener failed to keep the straight razor level. This is actually very difficult. Yet, another reason why you need absolutely steady hands. The tendency is to lift the heel up as the straight razor is sharpened, concentrating pressure on the toe. Another reason is that as the razor is dragged across the stone, the heel only spends a short amount of time on the stone, the middle portion a little more, and the toe spends a great deal of time. This can be seen if you look at a typical X-pattern. If you drag the razor entirely across the entire face of the hone, the toe receives a disproportionate amount of time being sharpened. Consequently, the tip is over-sharpened.

Too much toe sharpening causes uneven wear
The frowning razor is the second most common honing mistake. The frown is not only unhappy, but it slowly creeps up on the straight razor, making it more and more useless. The problem with the frowning razor is twofold: 1) the razor is extremely difficult to shave with, being pointed towards the toe and heel, and having little to no contact with your face in the middle; and 2) the razor is extremely difficult to sharpen for the same reason.
Take a look at this razor with a fairly pronounced frown.

This is actually pretty bad. Take a look at the spine wear (the wear on the spine from repeated sharpenings). This razor shows signs of being honed thousands of times. Yet, the toe and heel only show very light hone wear, meaning this razor has probably only seen maybe 20 years of service, yet is showing a whole lifetime of service in the middle. I can remove a slight frown of 1/16″ deflection at the deepest point, but this razor is going to take a lot of work. Its still possible to save it, but the money I would charge to do so makes the project a bad value.
Take a look at this similar razor with yet another pronounced frown.
 You can see the same pattern. In this picture though, you can really see the spine wear. You see that flat area at the top, that is caused by sharpening the razor. Metal on both the spine and edge are removed while sharpening. Excessive wear in the middle. This razor is a little different because it has moderate wear at the toe and almost none showing at the heel. Let’s take a look at one more.

This razor is not as bad as the previous two. You can still see evidence of spine wear and the razor’s relative age, but the frown is not as bad. This frown is correctable. The deflection appears to be under 1/16″ at the deepest point. Our edge repair service should be able to turn this razor back into a shaving machine.
The frown is caused by excessive sharpening of the middle of the razor and not enough on the toe or heel of the razor. There are several possible culprits. One possible cause is the incorrect use of a narrow hone. If the sharpener uses a narrow stone, it extremely easy to forget about sharpening the toe or heel of the razor. Instead, the amateur razor sharpener concentrates all sharpening efforts on the middle of the razor, forgetting about the heel or toe.
Another possible cause is uneven pressure. What happens is that the sharpener started honing lightly, then as they dragged the razor across the stone, increased the pressure in the middle, and then lightened up again towards the end. Very similar to how excessive toe wear is formed, but the pressure is eased up on the end.
Yet another possible culprit is not enough time on the stone. This happens if one starts honing with the heel off of or almost off of the stone and immediately drags the heel of of the hone, and at the same time also ends the stroke early. Ending the stroke early means the toe isn’t sharpened as much.
As you can see, these problems are compounded by the fact that the middle will become sharper much quicker than the toe or heel. This further induces the amateur sharpener to continue sharpening and further exacerbating the problem. He will try to compensate for the lack of sharpness by doing more laps and removing more metal. While the toe and heel will eventually become sharp, the sharpness comes at the expense of lost metal in the middle.
The next honing mistake is a unique combination of two frowns.
An odd name to call a honing mistake, but there really is no other way to describe it. The edge is wavy. Essentially, what happened is that the sharpener managed to add two frowns or a frown and excessive toe wear to his razor. Let’s take a look.

 As you can see from the two examples, the wavy razor is just that. Wavy. The top picture shows a frown combine with a toe that curves upwards. You can see the tell-tale signs of excessive toe wear on the spine and in the way the edge curves upward. The second picture shows you a frown in the middle hidden by what appears to be a slightly smiling razor.
In the first example, the end result is caused by simply combining excessive toe wear with a frown. In the second example, you think that the razor is smiling, but in fact, the razor has a frown in between the smile. This is actually quite common because honing a smiling razor is extremely difficult and many people try and fail to hone them properly.

Click for animation
As you can see, this razor has two frowns. This is extremely rare and I actually don’t have my own example so I had to borrow one from coticule.be to illustrate the honing mistake. Click the picture to see an animation displaying the two frowns. This is caused from poor honing technique. This probably happened because the razor has/had a slight smile in the beginning. Over time innumerable honing mistakes caused two frowns to be formed. Another possibility is that this was caused by using a narrow hone and sharpening the razor in sections. The cure is to learn to hone properly. Double frowns are so extremely rare that here really isn’t much more I can say on the matter.
Some razors are meant to be curved. Other razors are meant to be straight, but people put a smile on them. While this isn’t bad per se, you are putting unnecessary wear & tear on the razor and making it do something it wasn’t designed to do in the first place. The honing mistake is when someone hones a smiling straight razor the same way as a straight edge. Even worse is when they make it into a frown! Check out the pictures below (they actually show a smiling razor with a frown being corrected, but they illustrate the point nicely).


The straight edge on a smiling razor is a problem because it defies the natural curvature of the razor. If you try to sharpen the razor like a straight edged razor, you will end up with a frown. Perhaps the razor will go straight first and then start frowning, but the end result is the same. You get picture #2.
The reason is simple. The curvature of the spine causes the middle of the edge to touch the hone more often than the rest of the razor. Consequently, if you hone the blade normally, you will remove more metal from the middle and very little from the edges. Compound this problem with the exacerbation of not being able to get the toe and heel sharp, and you have excessive honing of the middle. This quickly becomes a frown as you continually remove metal in the middle trying to get the toe and heel sharp.

This is the last example. Take a look at the picture illustrating the problem. Notice a frown in the heel? You can also see another small frown just left of the heel as well. Click the image to enlarge it and you’ll also notice that the toe of the razor is exhibiting much more hone wear than the heel. Clearly this razor is suffering from a number of problems, but let’s concentrate on the heel wear. As you can see, the heel was sharpened a lot. In fact, the heel would be ground away into a smirk if not for the bolster that got in the way. In addition, that frown just to the left is not looking good.
How the heel happened is simple. The person sharpening the razor couldn’t get the heel sharp enough to his liking and just sharpened the small area constantly until it was sharp enough for him. The bolster got in the way and he created a small frown or dent in the edge. What he should have done was ignore the bolster. In some cases it is just not possible or practical to make 100% of the edge shave ready. This is one of those cases. The bolster is just that, a bolster. It is not meant to be sharp. It’s there to protect you. Just like the bolster on forged kitchen knives.
There are a few more honing errors visible on many razors on ebay. Most of them involve honing a razor beyond its useful lifespan or trying to hone the bolster, but failing. But these are the top four.
To get your razor professionally sharpened and avoid any of these errors, go to our services page.

So, many people ask me about honing razors and invariably ask about the pyramid honing method popularized by Lynn Abrams. I covered it briefly in my Beginner’s Guide to Honing, but haven’t really tackled the subject since posting the guide. Now, I’ll admit, I have completely ignored sharpening razors on the blog other than the my honing process series. In this article, I will tackle the most talked about honing method to date: pyramid honing/sharpening. I’ll show you why your wasting your time and how you achieve the same results with 1/2 as much effort.
First off, lets start by defining what pyramid honing is. Well, pyramid sharpening of razor blades involves putting your razor inside of a pyramid. Now, it’s obviously important to use the correct pyramid, ie of copper, etc. Okay, now that you’ve got the razor inside the pyramid, all you have to do is leave the razor inside the pyramid for a day or two. The pyramid will use magnetic fields to re-sharpen the razor. So, using the power of pyramids, you can straight razor shave for very cheap.
Okay, on to the debunking: Mythbusters has already debunked this myth, so I won’t go through the trouble.
That is not pyramid honing. Pyramid honing is the honing process popularized by Lynn Abrams and Straight Razor Place. It is called a pyramid because the honing method resembles a pyramid. It resembles a pyramid in that the first level requires a lot of strokes or laps, then the next level reduces the amount of laps, and so forth until you reach the top of the pyramid where you only do a few laps on the stones.
The pyramid honing method requires two grits of sharpening stone. A 4k stone and an 8k stone. This is important for reasons I will elaborate upon further into the article. For now, you’ll have to trust me that it won’t be as effective with a different combination of grits. Now, the goal of the pyramid honing method is to get yourself a shave ready straight razor with a minimum of effort and skill. To give credit where credit is due, the pyramid method does actually achieve a shave ready razor with a minimum of knowledge and skill. However, the pyramid method is highly inefficient. I’ll show you why in a little bit. First, let’s look at what exactly the pyramid method is. The pyramid method requires the straight razor aficionado to do a certain number of strokes or laps on the 4k stone, then a certain number of laps on the 8k stone. The user then repeats the process until he/she ends up at the tip of the pyramid and does 1 4k lap and 10 or 20 8k laps. A lap is two back and forth strokes on the stone. One for each side of the edge. I will use strokes and laps as synonyms in the rest of this article.
So, for example’s sake, let’s look at a typical pyramid honing plan. At the bottom of the pyramid you can see that you do a lot of 4k laps and very few 8k laps. Then they even out in the middle, and finally at the top, the number of 8k laps vastly outnumbers the number of 4k laps. Here is a pyramid honing plan taken from SRP:
| Strokes on 4k | Strokes on 8k |
|---|---|
| 25 | 25 |
| 20 | 20 |
| 15 | 15 |
| 10 | 10 |
| 5 | 5 |
| 3 | 3 |
| 1 | 3 |
| 1 | 5 |
The truly interesting thing about the pyramid is that you can customize it to fit your needs as well. The above pyramid is highly inefficient. There is absolutely no benefit to doing 25 8k strokes on the base level. Here is my suggested pyramid if your interested in actually pursuing this method of honing.
| Strokes on 4k | Strokes on 8k |
| 20 | 1 |
| 15 | 1 |
| 10 | 5 |
| 5 | 5 |
| 3 | 3 |
| 1 | 5 |
| 1 | 10 |
As you can see, I’ve cut out the excess 8k strokes. Why did I cut out those strokes? Because they’re a waste of time!!! Let’s think about this logically, if the point of honing is to remove the prior scratches from the coarser stone, why the heck would you go back to the coarser stone? It is exactly the same principal used in sanding and metal polishing. You remove all the scratch marks from the previous grit and then move on to a higher grit. Sharpening a razor is no different. The end goal of the pyramid is to replace all the 4k scratches with 8k scratches.
Now, am I saying this method does not work? No, absolutely not. It clearly works. Look at the end result. The end of the pyramid has you honing only once on the 4k stone and 5x-10x on the 8k stone. Doesn’t that seem like a little low you might ask. Yet, the answer is surprisingly no. While the 4k stone may require a large amount of laps or strokes, if you are skilled and don’t mess up the edge, the 8k stone only requires a maximum of 20 laps in most cases. Some razors require more, but that is getting into advanced honing topics. This is still Honing 101.
In the rest of the article I will explain first, why the pyramid system works, and then I will explain how it is actually inefficient.
Pyramid honing works. Don’t ever quote me as saying it doesn’t. It truly works. It is also a very simple formula for beginner’s to follow. Let’s first examine why the SRP wiki pyramid works. Our analysis will also take into account that the 8k strokes are completely voided by five or more 4k strokes. After 5 strokes on a significantly lower grit, all you’ve done is put back the scratch marks of the lower grit. Again, a topic for Honing 200. So, our analysis starts by removing all mention of 8k laps in the first half of the pyramid.
If you remove all the 8k strokes, your left with the following: 25+20+15+10+5 = 75 strokes on a 4k stone. That is 75 strokes just on the 4k stone. Now, the SRP Wiki article would also have you honing the same number of strokes on an 8k stone. So, if we add that in, that is another 75 strokes. Now, don’t think that the 8k strokes don’t do anything. They do. They remove a small amount of metal. However, they’re the functional equivalent of 1:2 or 1:4 4k:8k ratio. Said differently one 4k stroke removes the same amount of metal as 2-4 8k strokes. But I’m getting ahead of myself now. I’ll come back to this in the next part.
So, that is 75 strokes only on the 4k stone. That is a hell of a lot of strokes. Keep in mind your being told to do even more after the midway point. So, that is 75 strokes on the 4k stone. Of course, the razor will be sharp after 75 strokes on a 4k stone. A 4k stone is pretty darn close to shave ready. I call it shave-able if your skilled enough. But let me explain even further why 75 strokes will get that razor damn near shave-ready.
The untold story behind the pyramid plan is that you need to have a bevel set. This means you need to have prepared the razor, or have a razor that has already been prepared. Typically a bevel is set using a 1,000 grit stone. You can’t exactly shave with this grit, but it’s possible. Don’t do it. Just realize it’s possible. A typical progression after the 1k stone is to do X laps on the 4k stone until the razor is ready to move on to the next phase: 8k. Now, I can’t tell you exactly how many laps you need to do because it depends upon your skill at honing and the stone your using. However, I can tell you that 75 laps on a 4k stone is plenty enough. In fact, if you add in the extra 10 or so more 4k laps, it is definite overkill.
Yes, I did; and I’ll explain why the pyramid scheme still works. Okay, so the razor is now shave-able half way through the SRP pyramid. So, let’s move on and examine the second half of the pyramid. Actually, let’s just skip to the final two steps. The final two steps are 1 lap on the 4k stone, 3 on the 8k stone; and then 1 4k and 5 8k laps. Keep in mind that just before these final two steps, you were required to do 3 8k laps just before. So, let’s add up the number of 8k laps: 3+3+5 = 11. That is eleven laps just on the 8k stone. Compared with only two 4k laps, the 8k laps clearly win out. Now, while it is certainly true that the 4k undoes the work of the 8k stone, only one lap isn’t that bad. Even if the 4k stone erased all of the 8k stone’s work, your still left with 5 good and uninterrupted strokes on the 8k stone. While not ideal, your razor is still shave-ready.
Now, let’s look at my pyramid scheme: That is a total of 15 8k strokes, to only two 4k strokes. In addition, you finish with 10 strokes on the 8k stone. Now, I’m going to give away a secret. 10 strokes on an 8k stone is all you really need if your truly skilled at honing. So, even if that 4k stroke messes up the 5 strokes in the second to last level, the 10 final strokes makes up for it. So, in the end, you have a shave-ready razor off of the 8k stone. Voila! It works! Yet, it’s incredibly inefficient. I’ll show you why shortly.
First I want to go back to the bevel setting. The #1 problem people have with honing their own razors is not enough prep work. They simply have no idea what they’re supposed to be starting with. The pyramid method works best if you have an already sharpened straight razor that you’ve been using for 12 months and want to re-sharpen it. OR if you have a factory sharpened straight razor from Dovo or TI have shaved with it a number of times, but it has gone dull. In both cases, the bevel is already set and you need do no more.
Contrast with buying an ebay junker and attempting to hone it yourself. The pyramid method is not ideal and probably won’t even work. Also contrast with a razor you’ve breadknifed to erase a frown or chip. The pyramid method WILL NOT work. Period. Well, it can, but you’d be masochistic to even make the attempt. So, now that you know the limitations of the pyramid method, you can see that it actually does and will work.
On to the meat of this article. Pyramid honing is inefficient because you are going backwards every single step of the pyramid. The obvious question you should be asking yourself at this point is: “Why am I even bothering with the 8k stone?” Exactly. Your wasting your time. Yes, the 8k stone removes metal, but think about how much more metal you would be removing if you just stuck to the 4k stone. Instead of doing five 8k laps, you could replace all of those laps with only one 4k stroke. The math is truly that simple.
Let’s face the reality of over-doing the 4k laps as well. 80 laps on the 4k stone is excessive. No razor should require that many laps. 50 is the most I’d say is necessary. So, your doing 30 more laps than required. That said, your bevel might not be perfectly set and the extra 30 laps could ensure a proper cutting edge. That said, even if you do 80 laps on the 4k stone, your not being terribly inefficient. The inefficiencies lie with the 8k laps.
SRP Wiki would have you performing 75 total laps on the 8k stone and then immediately wipe out your hard work on the 8k stone by using the 4k stone. Now that is just pointless. As I’ve said above, any laps done on the 8k stone before the final steps are better spent on the 4k stone removing more metal than the 8k stone.
Yes, I did. It is also highly inefficient, making you do extra work for no purpose whatsoever. The pyramid method works because it presents the new straight razor sharpener a plan for getting his/her razor to sharp. If the razor is not shave ready after utilizing the pyramid, the response is to do the pyramid over again. Once again, your wasting your time. If the razor is not sharp enough to shave after 80 laps on the 4k and 80 laps on the 8k, send the thing to a professional. Your bevel was clearly not set properly, or you fucked it up.
The pyramid does not undo what you did with the 8k stone because in the end, you finish on the 8k stone just like a normal progression. While the number of laps on the 8k stone may be pretty small considering you just wiped out a lot of 8k laps by going back to the 4k each time, five good laps is enough to get a shave ready edge. Especially if you consider that it’s really only one 4k stroke in between three laps on the 8k and then five more.
My pyramid is more efficient because it puts all the 4k work on the front end and requires almost no 8k strokes until the end. Then the final 8k laps are limited to ten, the correct amount.
No. There is no such thing as over-honing. A wire edge is formed because of poor technique, not doing too many laps.
No, the pyramid technique is not going to fix that problem either. A normal honing progression limits the number of strokes on the 8k stone. You shouldn’t be doing more than 20. If you do more than that, you need to work on your technique or buy a better stone. In addition, even if you do more than 20 laps, your not really going to cause any problems unless you use too much pressure in the wrong places.
The idea that the 4k stone will erase the wire edge is true. It will. But to create a wire edge, even when using incorrect pressure, requires many strokes on the 8k stone. This is because the 8k stone removes so little metal.
If you are creating a wire edge off of the 4k stone, the pyramid method will not help you. Honing on a higher grit stone is not going to remove the wire edge effectively. At best it will just break it off and leave you with a dull edge. You still have to go back to the 4k stone and fix the problem.
You should just learn to hone properly. Use a traditional and time tested progression. Do enough laps on the 4k stone to get it prepared for the 8k stone (remove the scratches from the previous stone or get the radius as close to zero as possible). Then move on to the 8k stone and limit the number of laps. Do 10 then shave. Do 10 again, shave again. If you can’t get it shave ready by then. Go back to the 4k stone. Repeat.
As you can see, while the pyramid system works, it is grossly inefficient. Even my own improved pyramid plan is inefficient. Your time is better spent sticking with the 4k stone until your done, rather than flipping the stone over or bringing over the 8k stone and moving the 4k stone aside. Your just wasting time.
Last word. All that said, it does work.

No, its not really patented, but it sure sounds catchy doesn’t it? The last 5% of the honing process is what everyone argues about. Yet the last 5% is what makes straight razor shaving what it is. Its what makes the shave more comfortable, smoother, easier, and closer. If all our razors were only shave ready, we might as well all switch to DE’s. They’re a lot more convenient, and you don’t have to muck around with finding the right angle and learning to use your left hand (if your truly serious about straight razor shaving). The last 5% make the straight razor sharper and more polished than a DE edge. Yet, the last 5% of the honing process is also where all the confusion, myths, hyperbole, and argument abound. There are literally hundreds of different ways you can finish a straight razor edge. I cannot even begin to list them all in general terms.
In the most general of terms there are three ways to finish an edge: pastes/sprays, natural stones, or synthetic stones. Using a paste or spray causes the edge to become more convex and the edge angle more obtuse. Clearly not desireable. We never use pastes or sprays to finish a razor. The problem with natural stones is that no two are the same. While two natural stones from the same vein may perform similarly, they aren’t exact duplicates. Thus, the hunt for that special natural stone better than the other natural stone you already own. The other problem with natural stones is that there are literally dozens of quarries these were mined from. Some perform well after certain stones, others don’t. Its a confusing morass of infinite combinations. Synthetic stones have the distinct advantage of being exactly alike. Man-made stones will perform exactly as you expect them to. However, this performance is limited to exactly what you expect from the stone. The other problem with synthetic stones is that mixing and matching doesn’t always work very well. Thus, it is generally recommended to stick with one manufacturer. This is because different manufacturers grit ratings vary wildly past 1,000 grit.
Treating each razor individually means exactly that. Before we even get to the final polishing stage, we check and double check the razor’s sharpness. We make sure the edge is beyond shave ready before we take it to the final stones. This ensures your razor receives the utmost benefit from our final polishing. Then, based upon the razor’s steel composition, grind, customer preferences, and bevel angle we decide upon the best stone in our arsenal to get the best final polish on your razor. If your razor would benefit the most from a scary sharp, but harsh Shapton 30k stone, we use that stone. For scary sharp and pretty smooth, we have a ~40k ceramic stone for that. If the edge would be smoother off of a Nakayama Kiita we use that; if an Asagi would produce a finer edge, we’ll use that stone. If an Escher/Thuringian would work better, we have that too. Some people prefer the edge off a coticule for its smoothness, others a scary sharp edge. People new to straight razors tend to have a much easier time with a smoother, but duller edge. We do that too. Years of experience lets us know the correct slurry levels for all natural stones and some synthetic stones. We can vary the slurry levels to get the edge we want.
Yet, the most important part of this final step is experience. Having sharpened/honed thousands of razors, we know exactly when to stop and how much pressure to apply to get the most out of our stones. Here’s the invisible trap: do too many laps on your finishing stone and your razor’s edge will either roll or break off; ruining all that hard work you’ve put in. Too much pressure and the edge will roll and form a burr. Too little pressure and nothing happens.
While we’re on the subject of pressure, pressure is extremely important in the steps leading up to the final polishing. No, that is an understatement. The foundation is vital. Not enough pressure on an earlier stone and the actual edge isn’t sharpened. Too much and the bevel is warped. If either of these two happen, the final polishing stones cannot fix the previous error. The stones will only polish the bevel above the edge and will do nothing. This is where those thousands of hours honing comes into play. Getting a razor shave ready is moderately difficult. Getting a razor beyond shave ready takes a mastery of the skill involved.
Having chosen the right medium for your razor, we polish the edge until its just right. Visual inspection using magnification makes sure the bevel is at the correct polish level for the stone we’re using. Then, we do a final test to make sure its where we want it. Then we do a couple of laps on the stone to resharpen the razor to its previous level. This is important because sharpness tests dull the razor. The HHT test doesn’t but only because it only tests the tiniest fraction of the edge and only dulls a hair’s width of the blade incrementally. Its very important to make sure the planned cutting edge is where we want it. So, we test the whole razor.
After the razor passes the final inspection process, we strop the razor for you. This is important because stropping brings out the final shaving edge. We use the finest strops the world has to offer. Real linen and high quality cotton; horsehide and cordovan (cowhide if requested). Then, we oil the blade, put it in a plastic baggie for transport and ship it back to you to enjoy.
We hope you enjoyed this series. Sorry it took so long to write this last part, but as you can see, it is the longest post so far.

Because “shave ready’ isn’t good enough. We’re just not satisfied with the level of polish and the edge off of the 8k stone. While shave ready is certainly comfortable and sharp, we want our razor to just look at the hairs and scare them into cutting themselves. We want the hairs to just “pop off” once contact with the razor’s edge is made. An 8k finish just doesn’t quite do that. Stay tuned for our series on why a smoother polish is better and why pulling happens.
Continuing the true honing process, we continue polishing the razor’s edge on a Naniwa 12,000 grit waterstone. Before beginning the next step, we continually examine each blade and test it. Once we are satisfied that we’ve gotten all the sharpness out of the 8k stone, we begin honing on the 12k stone. During these final polishing steps, individual attention to detail is critical. Over-honing and under-honing are the obvious pitfalls. The process can be likened to threading a needle.
Since each blade requires a different number of laps, we cannot tell you how many laps we do. As many as is required is the answer. It is a continual process of honing a few laps, testing, honing a few laps, testing. The process ends once we are satisfied with the edge. At this point, we consider the edge to be “beyond shave ready.” The razor is extremely sharp and will shave hairs effortlessly.
Yet, that isn’t the end of our honing process. While other honemeisters and razor sharpeners are satisfied with this level of polish, we aren’t. We are after the ultimate edge. There is one more step in our honing process. The final polishing procedure that makes our razors truly honed.


A beginner’s guide to get started honing your own razor. Covering the very basics of what you need and how to do it, this guide is for the straight razor enthusiast who wants to know exactly what goes into honing a razor. Check out our What Makes a Honemeister series for more insight into the honing process.
The following article explains in detail exactly what you need to start honing. As you can see, honing is not something to be taken lightly. The stones are costly and the skill requires a very large time investment. However, for the self-sufficient man, learning to hone is a must-have skill. While we recommend you only touch up your razor for best results, we understand the desire to be entirely self sufficient. We hope you enjoy the article and please leave comments below.
Necessary Equipment
The Plan
Pyramid Honing
Regular Progression
To Tape or Not
Finishing the Edge
How to Hone & Hold the Razor
Other Tips

While it is possible to use the one coticule method, link at the end of the article, it is recommended to buy multiple honing stones for best results. Yet, there are dozens, hundreds, perhaps even thousands of options out there. In the end, you want to match your equipment to the task at hand. Do you want to only touch up your razor? Do you need to set a bevel? Will you only be honing razors that need a touch up? Ebay clunkers? Badly damaged razors?
As you can see, the first thing you need to figure out is how far you want to go, and what you really want to accomplish.
This section details the minimum requirements for touching up an already professionally honed razor. It assumes you have already acquired a shave ready razor and you just need to touch it up after a couple of months. Keep in mind, the longer you go without touching up your razor, the harder it will be to bring back the edge. If you go too long, you will need to either spend an inordinate amount of hours on a finishing stone, or you need to use a lower grit stone. A coticule has the advantage of being able to do both jobs.
As for pastes and chromium oxide, you can conceivably continually use the pastes for the foreseeable future of the razor, however, over time the edge becomes rounder, more apple seed-like. Eventually the edge is reformed to the contours of the stropping medium and it will get no sharper, nor will it get any duller. Some people are okay with this level of sharpness, most people aren’t. That is something you need to decide over the long term.
The cheapest and best way to keep your razor shaving sharp is to get some chromium oxide and an extra strop. The chromium oxide works very well with a cloth-like piece. So felt, linen, cotton, etc strops will work just fine. If your wallet is exceptionally thin, a piece of balsa wood glued to a harder wood will do the trick in a pinch. You could cut off a strip of old jeans to use as a makeshift strop.
Sparingly apply the chromium oxide to the substrate and use the same motions as stropping. How to apply crox powder. If you purchase the crayon version, just rub it on the chosen medium lightly and then wipe off the excess with a paper towel. Remember, you do not need to make your strop look a deep green. All that is needed is enough to lightly coat the surface.
If you want to use a stone for touch ups, you need a finishing stone. A finishing stone is a stone used after the 8k stone. Natural finishing stones include Nakayama, Escher, Coticule, etc. Synthetic stones include: Shapton 16k or 30k, Naniwa 12k, Spyderco UF, etc. Vintage barber’s hones are also a good option.
The first thing you need to decide is whether you want a synthetic or natural stone. A natural stone will have more variance between each stone, whereas a synthetic is supposed to be the same exact stone, no matter which you buy. Cost is probably going to be a factor here as well. Economical options are either a Chinese stone (available at woodcraft) or a barber’s hone. In the synthetics world, it really doesn’t matter which stone you choose. It’s a personal choice that comes down to the feedback of the stone, how quickly it cuts, and how the finished blade feels when shaving. If you have the time and patience, try to find people who have the stone you want to purchase and ask them to finish your razor on it.
As we stated earlier. The longer you take in between touch ups, or if you don’t completely rehone the edge, the longer it will take to resharpen the razor. If you wait too long, you will need to use a lower grit stone (5k or 8k) to re-polish the shaving bevel.
For light to moderate honing, you are going to want at least an 8k stone, and preferably a 4k and 8k stone. Ideally, you want a 1k, 4k, and 8k stones. The 1k stone really cuts down on time, turning what could take several hours on the 4k stone, into just one hour or less on the 1k stone. Norton makes a 4k/8k combo stone, which is a pretty good buy. Again, there are natural and synthetic options, but I recommend sticking with the synthetic stones unless you want to go the single coticule route. You will also want some form of magnification. I prefer a quality 10x eye loupe; you get what you pay for. Another inexpensive option is the Radioshack $10 microscope (I don’t suggest this). The magnification is used to check for chips too small for your eye to see, facilitation of the marker test, etc.
For heavier honing (razors requiring a bevel reset), you are going to need at least a 1k stone. Ideally, you want a whole progression of stones from ~200 to 1,000 grit. This is necessary because the scratches left by a 200 grit stone cut deep and a 400 and 600 grit stone make life easier. Norton, DMT, Naniwa, and Shapton all make 1k stones and below. Norton makes a 1k/220 grit combo stone. DMT stones are diamond hones and cut quite fast. However, they leave deep scratch marks. It is recommended to stick with one manufacturer of synthetic stones because there is no universal grit rating. Thus, if you bought a Shapton 4k/8k set, yo should buy the Shapton 1k and below.
For restoration work (razors requiring bevel establishment/chips/other edge damage), you need a lower grit stone than 1k. DMT 320 or Shapton, Norton, & Naniwa 220 grit stones are good options. The point of this low grit stone is to cut through the metal quickly so you can reach the undamaged portions of the edge and get that bevel set using the 1k stone. More on this later.
In summary: figure out exactly what you want to do with your razor(s); try to stick with one brand; have fun!
Now that you have the stones you need to figure out how to use them. But before that, let’s discuss planning your honing venture.
For touch ups, you really just want to do enough strokes on the pasted strop or finishing stone so that the edge gets back to the level you want. Touch-ups mean the edge is still shaving sharp, but not quite up to the standards you expect/demand. When your razor gets to this point, do not wait; touch up the razor immediately. Do laps in sets of 10, do a patch test (shave a patch of hair) and determine if you want the razor to be sharper. Repeat until the razor is performing up to your standards. The number of laps and time commitment will depend upon the condition of the edge. For example, if you haven’t touched up the razor in six months and have a normal beard, expect to do approximately 40-80 laps and spend 20-40 minutes touching up the razor. This also depends highly upon how good at honing you are and the grit level of the stone you use.
I am going to discuss the hone plan from a 1k stone all the way up to finishing in this section.
The first thing that needs to be done is the bevel. The razor should be able to shave some arm hairs coming off the 1k stone. The razor should also pass the marker test (explained in the actual honing section). If the razor is too dull to shave anything, more work is needed. The razor should behave like a very sharp pocket knife. Even pocket knives can shave arm or leg hairs. Once the bevel is done, you can move on. BUT NEVER BEFORE. Getting the bevel right is the most important step.
After the bevel is done, you must make a choice. To do a regular 4k/8k progression, or use the pyramid. The end result is the same, the razor must shave acceptably at the end.
Popularized by StraightRazorPlace and Lynn Abrams, no honing guide can be complete without mentioning it. Please visit their website for more information. We do not use the pyramid method, but will try to briefly explain how it is used. The point of the pyramid is to do equal laps on the 4k and the 8k, until you reach one lap. The pyramid provides structure and a solid attack plan. A possible pyramid looks like this:
25/25
15/15
10/10
5/5
3/3
1/3
1/5
As you can see, it’s called a pyramid because the starting point has a larger number of laps than the end point. The pyramid is completely customizable and you can add a step (such as 20/20 or 2/2), change the number of strokes, and start at any step in the pyramid. If the razor is coming off the 1k stone, I recommend starting at 25 laps. If the razor is pretty close to being shave ready, I recommend starting at 10 laps or 5 laps. Where to start will become clearer with experience. When the pyramid is finished, the razor should be shaving sharp. The razor should be sharp all along the edge. If it is not, then go back to the 3 or 5 lap step. Remember, the bevel must be set before embarking upon the pyramid. Also, the pyramid illustrated above is only a guideline, feel free to craft the pyramid plan to your liking. More on Pyramids.
 A regular progression means to stay on the 4k stone until the razor is “done” and then move on to the 8k stone until it is shave ready. The 4k stone is done when it is pretty darn close to shaving or when it won’t get any sharper. It will take a lot of trial and error for you to develop your own test to determine whether the razor is done or not. Remember, the razor should be sharp all along the edge. I recommend doing 30 laps and continue in 10 lap increments until the razor is “done.” This is a more advanced method because it requires the honester to know how sharp the razor should be coming off the 4k stone. No amount of words will truly explain it, you’re going to have to figure it out for yourself. But a good starting point is whether the 4k stone has removed all the scratch marks of the 1k stone. I recommend doing 5 more laps just to make sure the edge will not get any better while you are developing your “4k test.”
Once done with the 4k stone, the 8k stone really just brings the edge to its final shaving sharpness. Not many strokes are needed at this point. Start with 10 laps and repeat until the edge is shaving acceptably. Each set of stones behaves differently and may require more or less laps than another stone from a different manufacturer. However, the principals are the same. Continue doing laps in small increments until the razor passes that benchmark.
 Taping the spine has a long and sordid history ever since it was first conceived. I am not going to go into the history of taping or the debate whether or not to tape. In this guide I will merely explain the benefits and potential drawbacks of taping the spine.
Taping the spine raises the angle of the bevel by a very small degree, making it more obtuse. The actual degree change is somewhere between .5 to 2 degrees (too small to really make a difference). The benefits of using tape on the spine include: protecting the spinework, eliminating further spine wear, makes a wedge easier to hone, less wear & tear on your hones, etc. By raising the spine off the hone, you no longer need to grind away at the spine in order to grind the bevel. Consequently, your hone is “used” less. By making the bevel angle more obtuse, less metal needs to be removed from the bevel when resetting, thus reducing the time needed for a bevel reset. (Not an issue with hollow ground blades, but it certainly reduces time spent honing wedges)
The cons to using tape are more long term. By not removing metal from the spine and removing metal from the edge, you are slowly increasing the bevel angle with each honing session. Eventually, your razor’s bevel angle will become too obtuse to be comfortable. How long this will take depends upon several factors. However, it is unlikely this will happen within 10-20 years. Other people think tape on the spine cheats future buyers because they don’t know how much actual honing the razor has received.
In the end, you must decide for yourself whether you want to tape or not. There is no majority opinion among honemeisters.
 More does not mean better. Doing more strokes than necessary does not improve the edge. If it does improve the edge, then you weren’t done. More strokes than necessary are, at the very least, wasteful and at worst, you could create a wire edge. To that end, do a set of ten back and forth laps on your finishing stone and then test the blade. Repeat until you are satisfied. I cannot tell you how long this will take as each stone is different and each person more or less skilled with hones and razors. In addition, each of us has a different idea of when the razor is finished to our satisfaction.
Finishing your razor is something very personal. Each of us needs to find out which medium and which progression produces that final edge that we love. The progression is the same as doing touch ups. Do laps in small increments until the razor is dialed in. We at A Sharper Razor are never satisfied and are always pushing for a sharper, smoother edge.
Now that you have the plan laid out, it is time to discuss the actual honing of a razor. I will discuss how to grip the razor and guide you through an x-stroke.
The Grip
You grip the tang of the razor in between the thumb and index finger. Your pinky finger should be curled around the scales. The other two fingers are support fingers and should be curled around the scales/tang. The only pressure needed by the index and thumb is whatever is necessary to control the razor on the stone. You do not need to grip the tang tightly at all. The pinky finger controls the angle of the blade in relation to the surface of the hone. This will make more sense after reading the rolling stroke section.
It is possible to hold the hone in your hand. However, if the hone is heavy, this becomes extremely uncomfortable. In addition, your hand is not a stable surface. Placing the hone on your lap is an option, but the best option is to place the hone on a stable surface, i.e. a table. You don’t have to follow this advice, but I get better results “benching” the hone.
Also known as the push method, you simply push the razor straight across the hone. This method only works with perfectly flat razors. Any imperfection in the edge will result in an uneven hone and dull spots.
The X-stroke is the most popular means of honing. Simply put, it works. The x-stroke helps to overcome any irregularities in the spine/edge and hone. Much thought has been devoted as to why the x-stroke works, but that is not the purpose of this guide. That said, a push stroke will also work. A push stroke is also self explanatory and needs no guide.
The stroke starts by laying the razor on the hone, the entire spine and edge should be touching the surface. Some people start the razor at a slight angle, but you can start the razor perpendicular to the hone.
If sitting, keep your elbow at or slightly above the level of your hand; if standing your elbow will naturally position itself above the hand (unless the hone is chest high). Pull the razor towards you and to the right. Pull straight towards you, not down, not up (this is why you keep your elbow at/above hand level). Use your pinky finger to make sure the spine and edge are flush with the stone.
Rotate the razor on the spine as shown. NEVER ROTATE THE RAZOR ON THE EDGE. For obvious reasons.
After facing the razor in the opposite direction, repeat the above steps in the opposite direction.
In this final section of our Beginner’s Honing Guide, we share with you some final tips and tricks you need to know. The first is the rolling x-stroke. Necessary for tackling smiling or frowning blades. Also useful for non-straight line edges. The second is the water and marker test. Necessary to know whether you can move on in your progression. AKA: whether your actually doing anything to the edge.
Rolling X-Stroke
The rolling-x is needed for razors with a pronounced smile. The stroke is exactly the same as a regular X-stroke, but the pinky is used to control the angle of the razor. The pictures below are an exaggerated rolling-x. The stroke starts with the heel of the razor lower than the toe. The middle is honed parallel to the surface of the hone, and the stroke is finished with the heel higher than the toe. The pictures explain the process. To adjust the height, adjust the tension of your pinky finger.
Other methods are possible. It is not the goal of this article to explain them all. If you have difficulty honing your razor, you are much better off sending it to a honemeister. For more information and animation, please click here.
To help determine whether the entire edge or the part of the edge you are honing is actually making contact with the hone, you can watch the water in front of the edge. The edge should be acting as a snow plough and displace all the water in front of it.
The marker test is to take a permanent marker, color the edge of the razor, do a couple of strokes on your stone and check under magnification if the very edge still has marker on it. If the entire bevel is shiny, your stroke is fine and the bevel is established. This test is best used in conjunction with optical magnification. We recommend a good microscope, or at the very least, a top of the line jeweler’s eye loupe.

I’m going to start out this series by saying how much I hate the term honemeister. However, razor grinder is the only other commonly used term to describe someone who sharpens razors. Razor grinder is associated with gypsies and comes with a negative connotation. In addition, razor sharpener is both longer and doesn’t have that je ne sais quoi that honemeister does. Finally, if we look at the use and meaning of adding the term meister to the end of a word, the term honemeister does fit the bill.
In this series, I’m going to talk about the qualities that you need to possess in order to hone your own or anyone else’s razors. I will go over the small things like towels and a steady water supply to the equipment and experience necessary. I will describe what exactly it is that the post topic imparts to the honing process and why it is vital to obtaining a wicked edge.
To start the series out, we’re going to talk about the most basic of basics: steady hands. Sure, you could buy a honing machine or a belt grinder, but the edge you will end up with will only be as sharp as a sharp knife. A factory sharp knife at that. No one wants to shave with one of those. Well, not when we have expertly honed straight razors available. All well-honed straight razors are sharpened by hand. Sharpened by hand on stones. Sharpened on these stones for hours at a time, using repetetive motions. One mistake and the entire process is set back one step. One bad stroke and you erase twenty or more good strokes that came before.
Not only do you have to be steady and perfectly consistent to achieve the best possible edge, you have to be able to vary the pressure. From barely touching the stone during the final stages, to heavy pressure when re-sculpting the bevel. Finally, dexterity is necessary. While not crucial, dexterity enables the razor sharpener to both save time and avoid damaging the edge when flipping the razor on the stones.
What other qualities do you think make a good honemeister? Let us know below.
 After refining the edge, we bring your razor to shave ready sharp using a Naniwa 8,000 grit bench stone. This hone brings the edge to what is universally regarded as shave ready. At this point the razor’s edge will give you a fine, smooth shave. The process becomes less sharpening and more polishing and refinement of the already existing edge. The 8,000 grit stone removes more of the tiny burrs and jagged edges from the actual edge and brings the razor’s edge closer to true. The end goal of this process is a bevel we can see ourselves in. The 5k stone imparted a near mirror finish on the razor, this stone takes the polish to the next level. The polish is so good, its a hair’s breadth away from being a true mirror finish. IN fact, the only reason we reserve that title is because the next step polishes the razor even further! Trust us, seeing is believing.
After the 5k stone, we polish the razor on the 8,000 grit stone until the razor’s edge gleams bright and true. The process at this stage is more polishing than sharpening. The edge is brought to an even smaller cutting angle. In mathematical terms, we are bringing the radius of the edge even closer to zero. In layman’s terms, we are working to reduce the width of the very edge as close to nothing (thin) as possible. We are working to even out any unevenness in the edge and to polish the bevel. Polishing the bevel is important because it cuts down on the cutting resistance. DE blades are coated with teflon to help cut through hairs, straight razors are polished to a mirror finish to help cut through hairs. The reason is simple, less surface resistance makes it easier to cut.
Getting the razor to shave ready depends upon each individual razor. 8,000 grit is extremely small. Consequently only minuscule amounts of steel are removed. Tougher steels take longer to remove the steel necessary to polish the edge and decrease the edge radius to acceptable levels. Even “regular” steel is still hardened and is extremely hard to cut, taking a substantial amount of time to perfect the edge. We do not stop until the razor is ready to shave. Upon achieving this level, we do a final visual inspection with magnification and prepare to take the razor to the next level.


The next step is to refine the edge. The 1k stone produces an extremely sharp edge. As we’ve said before, a very skilled straight razor user can actually shave with that edge. Just like you can shave with a very sharp knife. Refining the edge means bringing the razor to the very doorstep of shave readiness. I said that shaving with a 1k edge is possible. Well, shaving after this step in the process is actually not bad at all. The ATG pass leaves something to be desired, but by and large, this step leaves a damn near close to shave ready razor.
This next stone is a 5000 grit Naniwa Superstone. We like this stone because it imparts a finer edge than the 3,000 grit version. In addition, we have a 2,000 grit Chosera stone on standby if need be. Proceeding directly to the 5,000 grit stone takes a little more time, but not terribly much. While the 5k cuts pretty slowly, enough laps will polish that edge to a near mirror finish. It is still a little chalky and resembles 1k scratch marks, but you can certainly see your reflection in it if you look close enough.
The edge this stone imparts is what we call “shave-able.” Sharper than all but the most rigorously sharpened knives, but not quite what is universally deemed “shave ready.” This level of finish imparts a very good and refined level of polish on the bevel. The edge is so good that we could stop and call the razor done. However, our standards are beyond strict. We demand perfection. And this stone is nowhere near close to perfection. There are three more steps before we even think about calling the razor done.
At this step in the process, the goal is to produce a near shave ready razor. We perform enough laps on the stone as necessary to remove the 1k scratch marks from the edge of the razor. Only upon magnified visual inspection do we proceed. In addition, we also perform sharpness tests to make sure the razor is extremely sharp. While the HHT test is not a real sharpness test, it confirms our visual inspection that the razor is very very sharp. We do not use the HHT test in any subsequent steps. At this point, the razor still needs more sharpening. Bringing the edge to shave-ready is the next step.


